Month: June 2024 (page 1 of 2)

piaa sports physical form pdf

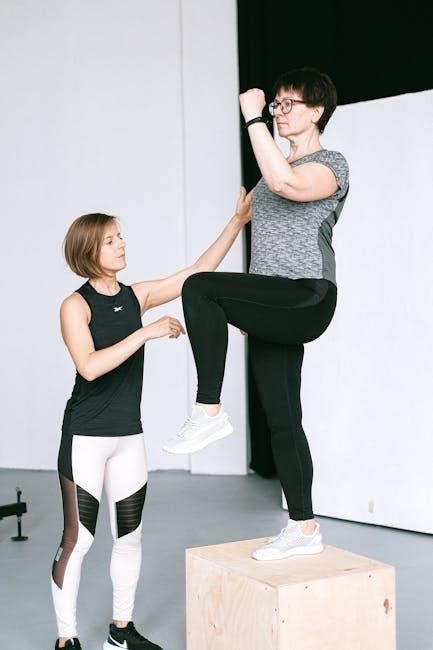
The PIAA Sports Physical Form is a mandatory document for student athletes in Pennsylvania, ensuring they meet health and safety standards to participate in school sports. It includes a comprehensive medical evaluation and consent forms, typically completed annually, with updates as required by the PIAA. The form is part of the CIPPE process and must be certified by authorized medical professionals to validate a student’s eligibility for athletic participation.

Overview and Importance

The PIAA Sports Physical Form ensures student athletes meet health and safety standards for participation in interscholastic sports. It evaluates medical history, physical condition, and readiness for athletic activities. Completion of this form is mandatory for eligibility, promoting safe participation and reducing injury risks. The form is updated annually, with proper certification required to validate a student’s ability to engage in sports safely and effectively.

Purpose of the Form

The PIAA Sports Physical Form is designed to ensure student athletes are medically cleared to safely participate in school-sponsored sports. It evaluates medical history, physical condition, and potential health risks. The form serves as a legal and regulatory requirement, ensuring compliance with state guidelines and promoting athlete safety. It is a critical step in verifying eligibility and readiness for sports participation during the academic year.

Understanding the PIAA Sports Physical Form Sections

The PIAA Sports Physical Form is a comprehensive document divided into multiple sections, each addressing specific aspects of a student athlete’s health and eligibility.

Section 6: Physician Certification

Section 6 of the PIAA Sports Physical Form requires a physician’s certification, confirming a student’s eligibility to participate in sports. It must be completed by a licensed medical professional after reviewing the student’s medical history and conducting a physical exam. This section ensures the student meets health standards and is free from conditions that could pose risks during athletic activities. It is the final approval step, making it a critical part of the form.

Other Key Sections of the Form

Beyond Section 6, the PIAA Sports Physical Form includes several other critical sections. Sections 1-5 cover medical history, parental consent, and health information. Section 7 addresses recertification for injuries sustained during the school year, requiring physician clearance. Section 8 is used for additional medical evaluations if needed. These sections ensure comprehensive health screening and compliance with PIAA regulations, safeguarding student athletes’ well-being and eligibility for participation.

The CIPPE Process: Comprehensive Initial Pre-Participation Physical Evaluation

The CIPPE is a mandatory process for PIAA student athletes, ensuring they meet health standards to safely participate in sports through a thorough medical evaluation and clearance process annually.

Steps Involved in CIPPE

The CIPPE process includes completing Sections 1-6 of the PIAA form, conducting a medical history review, performing a physical exam, and obtaining physician certification. Athletes must submit updated forms annually, with Section 6 requiring a doctor’s signature after May 1 for the upcoming school year. Additional steps involve parental consent, reviewing injury history, and ensuring all medical clearances are met before participation. This ensures athlete safety and compliance with PIAA regulations.

Required Documents for CIPPE

The CIPPE requires submission of Sections 1-6 of the PIAA form, including medical history, physical exam results, and physician certification. Additional documents include the Assumption of Risk & Parent/Student Guidelines form and ImPact Consent forms. For subsequent sports, Sections 5-6 must be completed if no physical was done. All paperwork, including injury warnings, must be submitted a week before preseason to ensure eligibility and compliance with PIAA standards;

Timeline and Deadlines for PIAA Physical Forms

Physicals must be completed after May 1, 2024, for the 2024-2025 school year. All forms, including Section 6, must be submitted by the deadline to ensure eligibility for participation.

When to Complete the Physical

The PIAA Sports Physical must be completed after May 1, 2024, for the 2024-2025 school year. Physicals are valid if completed within six weeks of the first practice date. Students must ensure their physicals are submitted by the deadline to avoid participation delays. Timely completion and submission are critical to maintain eligibility for sports activities throughout the school year.

Submission Deadlines

Submission deadlines for the PIAA Sports Physical Form vary by school district but generally require completion at least one week before the official preseason start. All paperwork, including Section 6, must be submitted by this deadline to ensure eligibility. Late submissions may delay participation, so athletes should plan accordingly to meet these timelines and avoid any issues during the sports season.

Eligibility and Requirements

Eligibility requires students to meet specific health and academic standards, with the form completed annually by authorized medical professionals to ensure participation safety.

Who Can Perform the Physical

The physical must be conducted by licensed medical professionals, including family physicians, Minute Clinic doctors, or authorized healthcare providers. Section 6 of the PIAA form requires a physician’s certification, while other sections can be completed by the student or parent/guardian. Ensure all medical evaluations are performed by qualified practitioners to validate the form accurately.

Authorized Medical Professionals

Only licensed medical professionals can perform and certify the PIAA Sports Physical. This includes family doctors, physicians at Minute Clinics, or other qualified healthcare providers. Section 6 must be signed by a licensed physician, while other sections may involve school nurses or medical staff. Ensure all evaluations are conducted by authorized professionals to maintain compliance with PIAA regulations.

Necessary Documentation and Forms

The CIPPE form includes Sections 1-6, with Section 6 requiring physician certification. Additional required documents include the Assumption of Risk and ImPact Consent forms.

Required Forms for Submission

The PIAA Sports Physical Form requires submission of the CIPPE form, including Sections 1-6. Additional documents include the Assumption of Risk form, Parent/Student Guidelines, and ImPact Consent forms. Section 6 must be certified by a physician, while other sections are completed by the student, parent, and medical examiner. These forms ensure compliance with PIAA regulations and confirm a student’s eligibility to participate in interscholastic athletics safely.

Downloading and Completing the Forms

The PIAA Sports Physical Form and related documents can be downloaded from the PIAA website or school athletic portals. Sections 1-5 are completed by the student and parent, while Section 6 requires a physician’s certification. Ensure all forms are signed and dated, with Section 6 completed after May 1 for the upcoming school year. Use the most recent version available to avoid submission issues.

Recertification for Subsequent Sports

Recertification is required for each sport within the same school year. Section 7 and Section 8 forms are used for recertification, ensuring ongoing eligibility and health clearance.

Process for Multiple Sports in the Same Year

For multiple sports in the same year, students must complete the CIPPE once. Section 7 is used for recertification between sports, requiring updates on injuries or health changes. If an injury occurs, a clearance note or Section 8 form is needed. All submissions must be completed a week before preseason starts, ensuring timely eligibility for participation.

Section 7 and Section 8 Forms

Section 7 is used for recertification when a student participates in multiple sports within the same school year. It updates health status and injuries since the initial CIPPE. If a student reports a new injury, a Section 8 form is required, completed by a physician, to ensure medical clearance. Both forms maintain continuity in health monitoring and compliance with PIAA regulations for ongoing athletic participation.

Accessibility and Language Options

The PIAA Sports Physical Form is available in multiple languages, including Spanish and Haitian Creole, ensuring accessibility for diverse student populations. This accommodates non-English speakers effectively.

Forms in Different Languages

The PIAA Sports Physical Form is available in Spanish and Haitian Creole to accommodate students and families who speak these languages. These translated versions ensure accessibility and understanding for diverse populations. The forms can be downloaded from the PIAA website or through designated school portals, making it easier for non-English speakers to complete the required documentation accurately. This inclusivity helps ensure all students can participate safely in sports.

Spanish and Haitian Creole Versions

The PIAA Sports Physical Form is also available in Spanish and Haitian Creole to ensure accessibility for diverse student populations. These translated versions can be downloaded directly from the PIAA website or through school athletic departments. They provide the same detailed requirements as the English form, ensuring non-English speaking families can complete the necessary paperwork accurately and efficiently. This promotes inclusivity and equal participation in school sports.

Submission and Upload Process

The completed PIAA Sports Physical Form must be submitted electronically via PowerSchool or as a hard copy to the school’s athletic department, ensuring timely processing for participation clearance.

How to Submit the Completed Form

The completed PIAA Sports Physical Form must be submitted via the designated school system, such as PowerSchool, or delivered in person to the athletic department. Ensure all sections are filled out accurately, including the physician’s certification. Submission should occur well in advance of the preseason start date to allow processing time. Confirm with the school for specific instructions and deadlines to ensure timely approval for participation.

Upload via PowerSchool

Once the PIAA Sports Physical Form is completed, it must be uploaded to PowerSchool, the designated platform for student records. Parents or guardians can log in to their PowerSchool account, navigate to the athletics section, and attach the PDF document. Ensure all required sections, including Section 6, are filled out and signed. Uploads are typically reviewed and approved by school administrators before clearance for sports participation is granted.

Resources and Support

The PIAA website offers comprehensive resources, including downloadable forms, instructions, and contact information for support. Access official guides and FAQs to ensure compliance with requirements.

Additional Information and Links

Visit the PIAA website for detailed guidelines, downloadable forms, and updated policies. Explore the Athletics Home page for specific instructions and access to the Injury Warning folder. Additional resources include multilingual support, with forms available in Spanish and Haitian Creole. Ensure compliance by referencing the official CIPPE documentation and submission deadlines for accurate processing.

PIAA Website and Contact Information

The official PIAA website (www.piaa.org) offers comprehensive resources, including downloadable forms, updated policies, and contact details. For inquiries, reach the PIAA office at 717-697-0374 or via email at pi aa@piaa.org. The website also provides links to multilingual forms, CIPPE guidelines, and submission deadlines, ensuring easy access for athletes, parents, and school administrators statewide.

12 week dumbbell workout plan pdf

Welcome to this comprehensive 12-week dumbbell workout plan, designed to help you achieve strength, muscle growth, and overall fitness. Perfect for home or gym use, this structured program ensures progressive overload and balanced development, with clear guidance on exercises, frequency, and nutrition for optimal results.

Why Dumbbells Are Ideal for a 12-Week Workout

Dumbbells are a versatile and effective tool for a 12-week workout plan, offering convenience and flexibility. They allow for a full-body workout, targeting both compound and accessory movements, making them ideal for building strength and muscle. Unlike barbells, dumbbells require more stabilization, engaging smaller muscles and improving overall coordination. Their portability and affordability make them perfect for home workouts, and they can be easily adjusted to suit different fitness levels. With proper form and progressive overload, dumbbells provide a balanced and efficient way to achieve fitness goals in just 12 weeks.

Benefits of a Structured 12-Week Training Program

A structured 12-week training program offers clarity, consistency, and accountability, ensuring steady progress toward fitness goals. It provides a clear roadmap, eliminating guesswork and helping you stay motivated. By dividing the plan into phases, you can focus on specific objectives, such as building a foundation, increasing strength, or enhancing hypertrophy. This structure allows for balanced development, reducing the risk of overtraining or neglecting key muscle groups. Regular progression and adjustments ensure continued improvement, making the program both effective and sustainable for achieving long-term results in strength, muscle growth, and overall fitness.

Understanding the 12-Week Workout Structure

This 12-week program is divided into three strategic phases, each focusing on specific goals like building a foundation, increasing strength, and enhancing hypertrophy. The structured approach ensures progressive overload and balanced muscle development, with clear exercise routines and intensity adjustments to keep you on track and prevent plateaus.

Phase 1: Building a Foundation (Weeks 1-4)

Phase 1 focuses on establishing a solid fitness base by introducing foundational exercises and building muscle endurance. Weeks 1-4 emphasize compound movements like squats, presses, and rows, performed with controlled reps to enhance technique and stability. This phase gradually increases intensity, allowing muscles and joints to adapt. Proper form is prioritized to prevent injuries and ensure effective progress. By the end of Phase 1, you’ll have a strong foundation, ready to tackle more challenging workouts in subsequent phases. Consistency and progressive overload are key to setting up long-term success.

Phase 2: Increasing Strength (Weeks 5-8)

Phase 2 shifts focus to building strength by introducing heavier loads and lower rep ranges. Weeks 5-8 prioritize compound exercises like dumbbell deadlifts, bench presses, and overhead presses, with a emphasis on progressive overload. Rep ranges decrease to 6-8 per set, allowing for greater intensity and muscle engagement. Accessory movements are tailored to strengthen key muscle groups, enhancing overall power. Proper form remains critical to avoid injury and maximize results. This phase lays the groundwork for future hypertrophy by establishing a stronger base, ensuring you’re prepared for the final phase of the program.

Phase 3: Focusing on Hypertrophy (Weeks 9-12)

Phase 3 emphasizes muscle growth through increased volume and higher rep ranges (10-15 per set). Workouts target specific muscle groups with isolation exercises like dumbbell flyes and lateral raises. Progressive overload continues by adding weight or reps weekly. Rest periods are reduced to enhance metabolic stress, promoting hypertrophy. Nutrition plays a key role, with a caloric surplus and sufficient protein intake essential. Recovery is prioritized to support muscle repair and growth; This phase culminates in a strong, lean physique, building on the strength and foundation established in earlier weeks. Tracking progress ensures continued growth and motivation.

Key Exercises in the 12-Week Dumbbell Workout

This program focuses on compound movements like dumbbell squats, deadlifts, and bench presses for full-body engagement. Accessory exercises target specific muscles, ensuring balanced growth and strength development.

Compound Movements for Full-Body Development

Compound exercises are the backbone of this plan, targeting multiple muscle groups simultaneously. Dumbbell squats, deadlifts, and bench presses are essential for building overall strength and muscle mass. These movements improve functional fitness and promote balanced development. By engaging major muscle groups, they maximize time efficiency and stimulate metabolic responses. Incorporating these exercises ensures a strong foundation, preparing the body for more specialized training in later phases. Consistency with these compounds drives significant progress, making them indispensable in the 12-week journey toward fitness goals.

Accessory Exercises for Targeted Muscle Growth

Accessory exercises complement compound movements by isolating specific muscles, ensuring balanced development. Dumbbell curls, tricep extensions, and lateral raises target the biceps, triceps, and shoulders, respectively. These exercises address muscle imbalances and enhance definition. They also improve joint stability and overall athleticism. Incorporating variations like incline dumbbell presses or bent-over lateral raises adds diversity to the routine. As the 12-week plan progresses, accessory exercises increase in intensity, particularly in Phase 3, to maximize hypertrophy. These targeted movements ensure no muscle group is neglected, supporting overall fitness goals and creating a well-rounded physique.

Training Frequency and Volume

Training frequency and volume are crucial for progress. Aim for 4-5 sessions weekly, balancing upper/lower or push/pull/legs splits. Increase weight or reps gradually to avoid plateaus.

How Many Days per Week Should You Train?

Training 4-5 days per week is ideal for most individuals, allowing adequate recovery and progressive overload. This frequency supports muscle growth and strength gains without overtraining. For beginners, starting with 3 days and gradually increasing is recommended. Ensure at least one or two rest days to promote recovery and prevent injury. Consistency is key, so choose a schedule that fits your lifestyle and goals, whether you prefer full-body workouts or split routines like upper/lower or push/pull/legs. Proper planning ensures sustained progress throughout the 12-week program.

Split Routines: Upper/Lower vs. Push/Pull/Legs

The Upper/Lower split involves dividing workouts into upper body and lower body days, focusing on muscle groups like chest, shoulders, back, arms, legs, and glutes. This split is ideal for balanced development and allows adequate recovery time between sessions. On the other hand, the Push/Pull/Legs split dedicates days to pushing movements (chest, shoulders, triceps), pulling movements (back, biceps), and legs. This split is beneficial for emphasizing upper body development and balancing push and pull muscles. Both routines are effective, and the choice depends on individual goals and preferences.

Progressive Overload in the 12-Week Plan

Progressive overload is essential for strength gains, involving gradual increases in weight or intensity. This ensures continued progress and avoids plateaus, optimizing muscle development throughout the program.

How to Increase Weight and Intensity

Increasing weight and intensity is crucial for progressive overload. Start by adding small increments of weight weekly, ensuring proper form is maintained. Gradually reduce rep ranges or incorporate more challenging exercises like single-arm movements. Focus on compound lifts first, then accessory exercises. Use rest-pause sets or supersetting to enhance intensity without compromising form. Track progress to ensure consistent growth and avoid plateaus; Adjustments should be data-driven, reflecting strength gains and muscle adaptation. This systematic approach ensures safe and effective progression throughout the 12-week program.

Adjusting Reps and Sets for Continued Progress

Adjusting reps and sets is essential for sustained progress. Start with higher rep ranges (12-15) for hypertrophy, then shift to lower reps (6-8) for strength. Periodically increase sets or decrease rest time to challenge muscles. For example, switch from 3 sets of 12 reps to 4 sets of 8 reps. Incorporate variation in rep tempos or pause reps for added intensity. Deload weeks every 4-6 weeks with reduced volume to prevent overtraining. Track progress by increasing weight or reps while maintaining form. This structured approach ensures continuous adaptation and avoids plateaus, keeping your workouts effective and engaging throughout the 12-week plan.

Nutrition and Recovery for Optimal Results

Proper nutrition and recovery are vital for maximizing gains. Focus on a balanced diet with sufficient protein, carbs, and fats. Stay hydrated, prioritize sleep, and incorporate rest days to avoid overtraining. These elements ensure your body repairs and grows efficiently, supporting the effectiveness of your 12-week workout plan.

Macronutrient Breakdown for Muscle Growth and Fat Loss

A well-structured macronutrient plan is essential for achieving muscle growth and fat loss. Aim for a daily intake of 1.6-2.2g/kg of protein to support muscle repair and growth. Carbohydrates should make up 40-50% of your calories, focusing on complex carbs like oats, rice, and vegetables for sustained energy. Healthy fats, including avocados and nuts, should account for 20-30% of your intake to support hormone production. Adjust your caloric intake based on goals: maintain calories for muscle growth or create a deficit for fat loss. Pair this with 5-6 meals daily and proper hydration for optimal results.

The Importance of Hydration and Sleep

Hydration and sleep are critical for maximizing workout results. Aim to drink 3-4 liters of water daily, adjusting for activity levels and climate. Even mild dehydration can impair strength and endurance. Sleep is equally vital, with 7-9 hours per night recommended for muscle recovery and growth. Poor sleep disrupts hormone production, including testosterone and growth hormone, which are essential for muscle development. Prioritize a consistent sleep schedule and create a relaxing bedtime routine to enhance recovery. Proper hydration and sleep are foundational for progress in your 12-week dumbbell workout plan.

Tracking Progress and Staying Motivated

Regularly monitor strength gains and physique changes to stay motivated. Celebrate small victories, set achievable milestones, and use progress photos or workout logs as visual tools for encouragement and accountability.

How to Monitor Strength and Physique Changes

Tracking progress is essential to stay motivated and ensure the effectiveness of your workout plan. Start by maintaining a workout log to record the weights, reps, and sets completed each session. Over time, observe increases in strength by noting how much you can lift or how many reps you can perform. Physique changes can be monitored through progress photos taken weekly or bi-weekly, focusing on consistent angles and lighting. Measure body fat percentage or track circumference measurements to assess muscle growth and fat loss. Celebrate small victories, like mastering a new exercise or noticing improvements in mirror reflection, to maintain motivation throughout the 12-week journey.

Staying Consistent and Avoiding Burnout

Consistency is key to achieving results in your 12-week dumbbell workout plan, but it’s equally important to avoid burnout. Set realistic goals and maintain a steady routine, allowing time for rest and recovery. Listen to your body and take rest days when needed to prevent overtraining. Stay hydrated, prioritize sleep, and fuel your body with a balanced diet to support energy levels and recovery. Track your progress in a workout log to stay motivated and celebrate small milestones, like mastering a new exercise or increasing weights. By balancing discipline with self-care, you’ll maintain momentum and enjoy a sustainable fitness journey;

Safety and Form in Dumbbell Training

Proper form and safety are crucial in dumbbell training to prevent injuries and maximize results. Always prioritize controlled movements and seek professional guidance to ensure effectiveness.

Proper Form to Prevent Injuries

Maintaining proper form during dumbbell exercises is essential to prevent injuries and ensure effective muscle engagement. Start with a stable stance and engage your core for balance. Focus on controlled movements, avoiding jerky or bouncy actions that can strain muscles. Keep weights close to your body when lifting to reduce strain on joints. Ensure full range of motion without sacrificing form. If unsure, consult a certified trainer to correct your technique. Prioritizing form enhances safety and maximizes workout benefits, helping you progress without setbacks.

Warm-Up and Cool-Down Routines

A proper warm-up prepares your body for exercise, reducing injury risk and improving performance. Start with 5-10 minutes of light cardio, such as jogging in place or jumping jacks. Follow with dynamic stretches like arm circles, leg swings, and torso twists to activate muscles. After your workout, cool down with static stretches for 5-10 minutes, focusing on major muscle groups like hamstrings, chest, and shoulders. Incorporate deep breathing to promote relaxation and aid recovery. A consistent warm-up and cool-down routine enhances flexibility, prevents soreness, and supports overall workout efficiency and safety.

carrier comfort pro apu manual

Overview of the Carrier Comfort Pro APU

The Carrier Comfort Pro APU is a compact, efficient auxiliary power unit designed to provide quiet operation, heating, cooling, and electrical power for truck cabs, reducing fuel consumption.

1.1 Key Features of the Carrier Comfort Pro APU

The Carrier Comfort Pro APU is equipped with advanced features designed for optimal performance and driver comfort. It includes automatic temperature control, which maintains a consistent cab climate by periodically activating the HVAC system. The unit also features a fuel-efficient design, saving approximately one gallon of fuel per hour compared to idling the truck engine. Its compact and lightweight construction makes it ideal for installation in various truck models without compromising space. Additionally, the APU operates quietly, reducing noise pollution and enhancing driver rest quality. It supports both manual and automatic operation modes, allowing drivers to customize their comfort settings. The system also includes safety features like emergency shutdown and fuel/coolant management for reliable operation.

1.2 Benefits of Using the Carrier Comfort Pro APU

The Carrier Comfort Pro APU offers numerous benefits for truck drivers and fleets. It significantly reduces fuel consumption by eliminating the need for engine idling, saving approximately one gallon of fuel per hour. This not only lowers operating costs but also minimizes emissions, contributing to environmental sustainability. The APU provides consistent heating, cooling, and electrical power, ensuring driver comfort during rest periods. Its quiet operation enhances sleep quality, improving driver productivity and safety. Additionally, the APU reduces wear and tear on the main engine, leading to lower maintenance costs over time. These features make the Comfort Pro APU a practical and efficient solution for long-haul trucking operations.

1.3 Compatibility with Different Truck Models

The Carrier Comfort Pro APU is designed to be compatible with a wide range of truck models, ensuring versatility for various fleet operations. It supports both diesel and electric-powered systems, making it suitable for trucks from leading manufacturers such as DAF, Mercedes-Benz, and others. The APU’s universal design allows for seamless integration with different truck makes and models, providing consistent performance across the board. Additionally, its compact size and flexible installation options make it adaptable to various cab configurations. This broad compatibility ensures that drivers and fleets can benefit from the Comfort Pro APU’s efficiency and comfort, regardless of their truck model. Proper installation and compatibility checks should be performed to ensure optimal functionality.

Installation Instructions

The Carrier Comfort Pro APU installation requires careful preparation and adherence to the provided manual. Ensure all components, such as the APU, HVAC, and control panel, are properly connected. Follow the step-by-step guide for a seamless setup, and consult a trained professional if necessary to ensure safety and optimal performance.

2.1 Pre-Installation Requirements

Before installing the Carrier Comfort Pro APU, ensure the truck model is compatible and review the installation manual thoroughly. Gather all necessary tools and components, including mounting hardware and electrical connectors. Verify the truck’s electrical system can support the APU’s power requirements and ensure proper ventilation for the unit. Check the fuel and coolant supply lines for compatibility and integrity. Familiarize yourself with local regulations and safety guidelines. Ensure the installation area is clean and free from obstructions. Properly prepare the vehicle’s battery and electrical system to avoid power issues during installation. Finally, confirm all APU components are included in the package and undamaged before proceeding.

2.2 Step-by-Step Installation Guide

Begin by mounting the APU securely to the truck, ensuring it is level and properly fastened. Connect the electrical system, starting with the battery and ensuring all wiring matches the manual’s specifications. Install the control panel in an accessible location, following the provided template for drilling and mounting. Connect the fuel and coolant lines, ensuring they are properly sealed and routed away from heat sources. Plug in the HVAC ducts and verify all connections are secure. Finally, test the system by turning on the APU and checking for proper operation of heating, cooling, and electrical power. Refer to the manual for specific torque and connection details.

2.3 Main Components of the APU System

The Carrier Comfort Pro APU system consists of several essential components. The auxiliary power unit itself is the core, providing heating, cooling, and electrical power. The control panel serves as the user interface, allowing operators to adjust settings and monitor system status. The HVAC system includes ducts and vents for distributing conditioned air throughout the truck cab. Additionally, the system features a fuel supply unit and coolant supply lines to ensure efficient operation. Finally, the wiring harness connects all components, enabling seamless communication and power distribution. Each part is designed to work together to provide reliable performance and comfort for drivers. Regular maintenance of these components is crucial for optimal functionality.

Operating the Carrier Comfort Pro APU

The Carrier Comfort Pro APU offers manual and automatic operation modes. In manual mode, users can directly control heating, cooling, and power settings. The Comfort Monitor automates these functions based on temperature preferences.

3.1 Manual Operation Mode

In manual operation mode, the Carrier Comfort Pro APU allows users to directly control the heating, cooling, and electrical power settings. This mode is ideal for drivers who prefer precise control over their cabin environment. By using the APU control panel, users can adjust temperature levels, fan speed, and power distribution. The system is designed to be user-friendly, with clear buttons and indicators for easy operation. Manual mode is particularly useful when specific conditions are needed, such as maintaining a consistent temperature or powering external devices. The APU ensures efficient energy use and quiet operation, even when controlled manually, making it a reliable choice for truck drivers.

3.2 Automatic Operation Mode (Comfort Monitor)

The Comfort Monitor feature allows the Carrier Comfort Pro APU to automatically manage the truck cab’s environment, ensuring optimal comfort with minimal user input. When enabled, the system periodically starts the APU and HVAC to maintain a preset temperature, eliminating the need for manual adjustments. This mode is particularly useful for long hauls or during rest periods, as it ensures consistent comfort without constant monitoring. The Comfort Monitor also includes a timer and temperature start function, which automatically activates the APU when the temperature drops below a specified level. This feature enhances fuel efficiency and reduces engine wear, making it a convenient and energy-saving solution for drivers.

3.3 Understanding the APU Control Panel

The Carrier Comfort Pro APU control panel is designed for intuitive operation, featuring a user-friendly interface with buttons and a display screen. Drivers can easily switch between manual and automatic modes, adjust temperature settings, and monitor system status. The control panel includes indicators for power, heating, cooling, and error messages, ensuring clear communication. The menu system allows users to set timers, temperature thresholds, and other preferences, providing customization for comfort and efficiency. Understanding the control panel’s functions is essential for optimizing APU performance, ensuring proper operation, and troubleshooting issues effectively. This interface is central to managing the APU’s advanced features, making it a key component for driver convenience.

Maintenance and Troubleshooting

Regular maintenance and troubleshooting are crucial for optimal performance. Follow the manual’s maintenance schedule for inspections, filter changes, and addressing common issues promptly.

4.1 Regular Maintenance Schedule

The Carrier Comfort Pro APU requires routine maintenance to ensure optimal performance. Daily checks include inspecting coolant levels, oil levels, and air filter cleanliness. Weekly, ensure the battery is charged and connections are secure. Monthly, replace or clean the air filter and inspect belts for wear. Every 500 hours, change the oil and oil filter, and check the fuel filter. Annually, inspect the coolant system, HVAC components, and electrical connections. Refer to the manual’s maintenance schedule for detailed procedures and intervals. Regular maintenance prevents issues and extends the APU’s lifespan, ensuring reliable operation and energy efficiency. Always follow the manufacturer’s guidelines for best results.

4.2 Common Issues and Troubleshooting Tips

The Carrier Comfort Pro APU may encounter issues like failure to start, error codes, or reduced performance. If the APU doesn’t start, check the battery connections and ensure the fuel level is adequate. For error codes, refer to the manual to identify the issue and reset the system if necessary. Overheating can occur due to low coolant levels or a blocked radiator; ensure proper coolant circulation and clean the radiator as needed. If the APU operates noisily, inspect for loose belts or worn components. Regularly updating software and ensuring proper ventilation can resolve many issues. Always follow troubleshooting steps in the manual before contacting support.

4.3 Resetting the APU System

To reset the Carrier Comfort Pro APU system, first ensure the unit is turned off and all accessories are disconnected. Locate the reset button, typically found on the control panel or near the power supply. Press and hold the reset button for 5-10 seconds until the system lights flash, indicating the reset process has started. Release the button and allow the system to reboot. If issues persist, refer to the manual for specific reset procedures or update the system software. Always follow safety guidelines when performing a reset to avoid any potential damage or electrical hazards. Resetting should resolve most software-related issues, restoring the APU to its default settings.

Safety Guidelines

Always handle fuel and coolant safely, follow emergency shutdown procedures, and adhere to general safety guidelines to ensure safe operation; Refer to the manual for detailed precautions.

5.1 General Safety Precautions

Always follow proper safety protocols when operating the Carrier Comfort Pro APU. Ensure the area around the unit is well-ventilated to avoid exhaust fumes accumulation. Avoid overexposure to fuel or coolant, and handle them with care. Keep flammable materials away from the APU. Never operate the unit near open flames or sparks. Wear protective gear, such as gloves and safety glasses, when performing maintenance. Ensure the system is turned off and cooled before servicing. Follow all local regulations and manufacturer guidelines for safe operation. Regularly inspect hoses and connections for leaks or damage. Keep the APU control panel clean and dry to prevent electrical issues. Adhere to these precautions to ensure safe and reliable performance.

5.2 Emergency Shutdown Procedure

In case of an emergency, such as a malfunction, fire, or coolant leak, follow these steps to shut down the Carrier Comfort Pro APU safely. First, locate the emergency shutdown switch, typically found near the control panel or on the exterior of the unit. Activate the switch firmly to halt all operations immediately. Ensure the area is clear of personnel and flammable materials. Turn off the fuel supply and electrical power to the APU if possible. Do not attempt to restart the unit until the issue has been resolved by a qualified technician. Always refer to the manual for specific instructions tailored to your model.

5.3 Handling Fuel and Coolant Safely

When handling fuel and coolant for the Carrier Comfort Pro APU, always wear protective gloves and eyewear to prevent exposure. Ensure the area is well-ventilated to avoid inhaling fumes. Store fuel and coolant in approved containers, away from heat sources and open flames. Avoid overfilling the fuel tank to prevent spills. If a spill occurs, contain it immediately and clean it up using absorbent materials; Dispose of hazardous materials according to local regulations. Never mix coolant types, and ensure the coolant is pre-mixed to the correct concentration. Refer to the manual for specific guidelines on fuel and coolant specifications to maintain safety and system performance.

Additional Resources

For detailed instructions, download the full manual from Carrier’s official website. Contact customer support for assistance or additional resources. Visit www.carrier.com for more information.

6.1 Where to Find the Full Manual

The full manual for the Carrier Comfort Pro APU can be downloaded from Carrier’s official website at www.carrier.com. It is available in PDF format and covers models such as PC6000, PC6011, PC6012, and PC6013. The manual includes detailed operation, installation, and maintenance instructions. Additionally, you can access the manual through the Carrier Transicold website or authorized dealers. For specific models like the PC6000, visit carrier.com/manuals and search for “ComfortPro PC6000.” Ensure to download the correct version corresponding to your APU model for accurate information.

6.2 Contact Information for Customer Support

For assistance with the Carrier Comfort Pro APU, contact Carrier Transicold customer support at carrier.com/support/contact. You can reach them by phone at 1-800-227-3050 or via email at carrier_service@carrier.com. Additionally, visit the Carrier website for regional support centers and authorized service dealers. For specific queries, refer to the service manual or contact local distributors listed on the Carrier website. Ensure to have your APU model number ready for efficient support.

country roads guitar chords pdf

John Denver’s “Country Roads” is a timeless classic, beloved for its nostalgic lyrics and memorable melody. Its simplicity makes it a favorite among guitarists of all levels, with resources like PDF tabs and chords widely available, ensuring its enduring popularity across generations and skill sets.

1.1 Overview of the Song and Its Cultural Impact

“Country Roads,” written by Bill Danoff, Taffy Nivert, and John Denver, was released in 1971. It became an iconic anthem celebrating West Virginia’s beauty and heritage. The song’s heartfelt lyrics and soaring melody have made it a cultural phenomenon, resonating globally. Its enduring popularity is evident in its widespread use in various covers, tributes, and adaptations, solidifying its place in music history and folklore;

1.2 Why Guitarists Love Playing “Country Roads”

Guitarists adore “Country Roads” for its simple yet memorable chord progression, primarily using G, Em, D, and C; The capo on the 2nd fret simplifies playability, making it accessible to beginners while offering depth for advanced players. Its versatility allows creative variations, such as fingerpicking or strumming patterns, ensuring it remains a favorite for musicians of all skill levels and styles, fostering a sense of musical connection and enjoyment.

Basic Guitar Chords Needed for “Country Roads”

The song primarily uses G, Em, D, and C chords, with a capo on the 2nd fret to match John Denver’s original key, ensuring a smooth and iconic sound.

2.1 Essential Chords: G, Em, D, and C

The foundation of “Country Roads” lies in the G, Em, D, and C chords. These chords are used throughout the song, with G and Em creating the verses’ nostalgic feel, while D and C provide harmonic depth. The capo on the 2nd fret enhances the song’s bright, iconic sound, making these chords essential for capturing John Denver’s original arrangement. Mastering these chords is key to playing the song smoothly and authentically.

2.2 Understanding Capo Usage (Capo on 2nd Fret)

The capo on the 2nd fret is crucial for matching John Denver’s original key in A. It raises the pitch of the guitar, allowing the use of simpler chord shapes (G, Em, D, C) while maintaining the song’s bright, iconic sound. This technique ensures the melody aligns with the vocal range and creates the signature “Country Roads” feel, making it accessible for guitarists to replicate the song faithfully.

Guitar Tablature and Sheet Music

Free PDF downloads of “Country Roads” tablature and sheet music are widely available, offering detailed chord diagrams, lyrics, and melody notations for guitarists to learn and play the song effectively.

3.1 Where to Find Free PDF Downloads

Free PDF downloads of “Country Roads” guitar tabs and sheet music are available on websites like StrumTheGuitar.com and Yunus-Guitarist.com. These resources include chord diagrams, lyrics, and musical notations, making it easy for guitarists to access and learn the song. Simply search for “Take Me Home Country Roads guitar chords PDF” to find these files and start playing.

3.2 Reading Tablature vs. Sheet Music

Tablature provides a visual guide for guitarists, showing string positions, while sheet music offers a musical notation. Both formats are available for “Country Roads,” allowing players to choose their preference. Tabs are often easier for beginners, as they detail exact finger placements, whereas sheet music requires understanding of musical notes and rhythm, catering to more advanced musicians seeking precise melody and harmony.

Strumming Patterns and Rhythm

The song features a simple yet iconic DDUUDU strumming pattern, perfect for beginners. This versatile rhythm can be adapted to create a more dynamic or mellow feel.

4.1 Basic Down-Down-Up-Down-Up (DDUUDU) Pattern

The DDUUDU pattern is a fundamental strumming technique for “Country Roads,” providing a steady rhythm that complements the song’s melody. Starting with a downstroke, followed by another down, then up, and two more downs, this pattern creates a smooth, flowing sound that enhances the song’s nostalgic feel and makes it easy for beginners to follow and play along.

4.2 Advanced Strumming Techniques for Feel

Advanced strumming involves mixing fingerpicking with rhythmic variations to add emotional depth. Techniques like emphasizing certain beats, adding syncopation, or incorporating fingerpicking patterns can enhance the song’s feel. Dynamics, such as softer verses and stronger choruses, also add texture. These methods allow players to personalize the song while maintaining its iconic melody and rhythm, making it more engaging for both the player and the audience.

Lyrics and Chord Progression

The song features poetic lyrics about West Virginia’s beauty, paired with a memorable chord progression. Verses follow G, Em, D, C, while choruses use G, D, Em, C, creating a timeless melody.

5.1 Verse 1: G, Em, D, C Progression

Verse 1 of “Country Roads” begins with a G chord, transitioning to Em, then D, and finally C. This progression sets the song’s folk-inspired tone. The lyrics, such as “Almost Heaven, West Virginia,” are sung over these chords, creating a harmonious blend that captures the essence of the song’s nostalgic appeal and natural beauty. The progression is simple yet effective, making it accessible for beginners while maintaining a rich, emotive sound that resonates with listeners of all levels.

5.2 Chorus: G, D, Em, C Progression

The chorus of “Country Roads” follows a G, D, Em, and C progression, creating a powerful and uplifting melody. This sequence emphasizes the song’s emotional appeal, with the G and D chords providing a strong foundation, while the Em and C add depth and resolution. The repetition of this progression makes the chorus memorable and easy to play, even for beginners, while maintaining the song’s iconic feel and singability.

Learning the Song for Beginners

Beginners can start by simplifying chord shapes and practicing transitions slowly. Focus on basic strumming patterns to build confidence and master the foundational elements of the song.

6.1 Simplified Chord Shapes and Transitions

Beginners can focus on simplified versions of G, Em, D, and C chords, using easier finger placements. Practice transitioning smoothly between these chords by slowing down the tempo and focusing on clean switches. Starting with chord shapes that require fewer fingers can help build confidence and improve dexterity before progressing to standard forms.

6.2 Practice Tips for Smooth Playing

Start with a slow tempo and gradually increase speed as confidence grows. Use a metronome to maintain steady timing. Focus on smooth chord transitions by practicing G, Em, D, and C progressions repeatedly. Break the song into sections, mastering each part before combining them. Emphasize consistent strumming patterns, such as DDUUDU, and ensure clean chord changes by minimizing finger movement. Regular practice ensures fluidity and enjoyment.

Advanced Techniques for Experienced Players

Experienced players can elevate their performance with fingerpicking patterns, harmonics, and string bends, adding depth and emotion to the iconic melody of “Country Roads.”

7.1 Fingerpicking Patterns

Fingerpicking patterns add a delicate, intricate feel to “Country Roads.” Using arpeggios, experienced players can break down chords into smooth, flowing notes, enhancing the song’s emotional depth. This technique creates a softer, more expressive sound, allowing for dynamic variations and a more personalized interpretation of the melody, making it a standout feature for advanced guitarists.

7.2 Adding Harmonics and Bends

Adding harmonics and string bends elevates “Country Roads” to a new level of emotional expression. Harmonics add a bright, crisp tone, while string bends create subtle pitch variations, adding depth and feeling. These techniques can be incorporated during the chorus or bridge, enhancing the song’s nostalgic vibe and providing a more dynamic performance for experienced players seeking to expand their artistic range and connection with the music.

Resources and Tutorials

Find free PDF downloads, recommended websites, and video lessons online to master “Country Roads.” Tutorials offer step-by-step guides, chord breakdowns, and practice tips for all skill levels.

8.1 Recommended Websites for PDF Downloads

Several websites offer free PDF downloads of “Country Roads” guitar tabs and chords. StrumTheGuitar;com provides detailed tabs with chord diagrams and lyrics. Yunus-Guitarist.com offers a PDF tutorial with chords and strumming patterns. E-Chords.net includes chord progressions and lyrics, while LearnGuitarInLondon.com offers a comprehensive guide with tabs and chord charts. These resources are ideal for guitarists seeking accurate and printable materials.

8.2 Video Lessons and Online Courses

Video lessons and online courses provide interactive learning for “Country Roads.” StrumTheGuitar.com offers video lessons with detailed chord breakdowns and strumming techniques. Yunus-Guitarist.com includes tutorial videos with PDF downloads for a comprehensive learning experience. LearnGuitarInLondon.com features step-by-step video tutorials and structured courses, making it easier for guitarists to master the song at their own pace and skill level.

Common Mistakes to Avoid

Common errors include rushing the tempo, incorrect chord transitions, and poor timing, especially in the chorus. Ensure smooth strumming and accurate capo placement for the best results.

9.1 Chord Transition Errors

One common mistake is rushing through chord changes, particularly between G and Em. Failing to place the capo correctly on the 2nd fret can also lead to tuning issues. Ensure smooth transitions by practicing finger placement and maintaining consistent strumming patterns. Pay attention to the D-C-G progression to avoid muffled sounds and keep the rhythm steady throughout the song.

9.2 Timing and Strumming Pitfalls

A common issue is losing rhythm, especially during the chorus, where the DDUUDU pattern can be tricky. Players often strum too quickly, disrupting the song’s flow. To maintain timing, practice the basic strumming pattern slowly and gradually increase speed. Focus on syncing the strumming with the lyrics to preserve the melody’s natural feel and ensure a smooth performance.

Performing the Song

Using a capo on the 2nd fret ensures the correct key, matching John Denver’s original version; Singing while playing requires smooth chord transitions and consistent strumming to maintain the song’s iconic feel.

10;1 Playing with a Capo

Using a capo on the 2nd fret is essential for achieving the song’s intended pitch and tone. This setup allows guitarists to play the standard G, Em, D, and C chords while maintaining the key of A, as originally performed by John Denver. The capo simplifies chord shapes, making the song more accessible for players of all levels to reproduce its iconic sound accurately.

10.2 Singing While Playing

Singing while playing “Country Roads” requires coordination between vocal melody and guitar rhythm. Use a steady strumming pattern to maintain the song’s flow, ensuring smooth transitions between chords. Practice singing along with instrumental breaks to refine timing. Start with slower tempos to build confidence, then gradually increase speed. Focus on the melody’s pitch and rhythm while keeping chord shapes accurate for a polished performance.

Variations and AlternateVersions

Explore alternate key versions and creative instrumental arrangements of “Country Roads” for fresh interpretations. These variations, available as PDF downloads, offer diverse ways to play and enjoy the classic tune while maintaining its original charm and melody.

11.1 Alternate Key Versions

Alternate key versions of “Country Roads” allow players to experiment with different sounds. Available as PDF downloads, these versions offer guitarists flexibility, whether playing in A or other keys, to match their vocal range or style, while maintaining the song’s essence. This versatility keeps the classic fresh and accessible for musicians of all levels, ensuring its timeless appeal and adaptability.

11.2 Instrumental Arrangements

Instrumental arrangements of “Country Roads” provide guitarists with creative variations. PDF tabs offer intricate fingerpicking patterns, harmonics, and bends, allowing for expressive solos. These arrangements enhance the song’s emotional depth and showcase technical skill, making them ideal for experienced players seeking to add complexity and personal flair to their performances, while staying true to the original’s charm and beauty.

Mastering “Country Roads” on guitar requires patience and practice. Use PDF tabs for accuracy, and gradually refine your technique. Embrace the journey, enjoy playing, and share the music’s timeless beauty with others, ensuring its legacy lives on through your performances and passion for the craft.

12.1 Summary of Key Points

The song “Country Roads” by John Denver is a beloved classic with accessible guitar chords, making it a favorite for players of all skill levels. Essential chords include G, Em, D, and C, with a capo on the second fret for the correct key. The song’s structure features verses and choruses with a consistent chord progression, allowing for easy learning and smooth transitions. Strumming patterns like DDUUDU provide rhythm, while sheet music and tabs are readily available online for reference. Practicing regularly will help master the song, and resources like video lessons and tutorials can enhance your learning experience. Emphasizing chord accuracy, timing, and feel will ensure a polished performance, making “Country Roads” a delightful addition to any guitarist’s repertoire.

12.2 Encouragement to Keep Practicing

Mastering “Country Roads” is achievable with consistent practice. Start with basic chords and gradually refine your technique. Use free PDF tabs and online tutorials to guide your learning. Don’t hesitate to explore variations or advanced techniques once comfortable. Remember, patience and dedication will enhance your skills, making each practice session rewarding and enjoyable as you bring this iconic song to life.

2018 ram 2500 manual

Welcome to the 2018 Ram 2500 Manual‚ your comprehensive guide to understanding and maintaining your vehicle. This manual provides detailed information on operation‚ maintenance‚ and safety features‚ ensuring optimal performance and longevity. Download the free PDF version for easy access to all the essential details about your truck.

Welcome to the 2018 Ram 2500

Welcome to the 2018 Ram 2500‚ a powerful and versatile pickup truck designed for both work and leisure. This manual serves as your guide to understanding the features‚ operation‚ and maintenance of your vehicle. The 2018 Ram 2500 combines robust performance with advanced technology‚ offering a comfortable and capable driving experience. Whether you’re towing heavy loads or navigating challenging terrain‚ this truck is built to deliver. Familiarize yourself with the contents of this manual to ensure safe and efficient operation of your Ram 2500.

Important Safety Guidelines

Always follow the safety guidelines outlined in this manual to ensure safe operation of your 2018 Ram 2500. Wear seat belts at all times‚ and ensure all passengers do the same. Never exceed the vehicle’s weight limits or tow capacities. Familiarize yourself with proper towing procedures to avoid accidents. Regular maintenance is crucial for safety and performance. Consult the manual for specific instructions and guidelines tailored to your vehicle. Always be aware of your surroundings while driving‚ especially when towing or operating in challenging conditions.

Key Features of the 2018 Ram 2500

The 2018 Ram 2500 offers powerful engine options‚ advanced technology‚ and premium cabin amenities. It features a robust design‚ exceptional towing capacity‚ and cutting-edge safety features‚ making it a top choice for heavy-duty tasks and comfortable driving experiences.

Engine Specifications and Performance

The 2018 Ram 2500 is powered by a 6.7L Cummins Turbo Diesel engine‚ delivering 400 horsepower and 1‚000 lb-ft of torque. It also offers a 5.7L HEMI V8 engine with 383 horsepower and 400 lb-ft of torque. Both engines provide exceptional power and efficiency‚ with the Cummins engine excelling in heavy-duty towing and hauling. The 68RFE 6-speed automatic transmission enhances performance‚ offering smooth shifting and optimal power delivery. These engine options ensure the Ram 2500 meets the demands of both work and everyday driving.

Cabin Amenities and Technology

The 2018 Ram 2500 offers a spacious and tech-savvy cabin designed for comfort and convenience. The Uconnect 8.4-inch touchscreen infotainment system provides seamless navigation‚ Bluetooth connectivity‚ and smartphone integration. Premium audio systems‚ such as the Alpine 10-speaker setup‚ deliver high-quality sound. Heated and ventilated seats‚ along with dual-zone climate control‚ enhance passenger comfort. Additional features include a rearview camera‚ USB ports‚ and storage compartments. These amenities create a refined and functional environment‚ blending productivity with luxury for both work and leisure drives.

Instrument Cluster and Controls

The 2018 Ram 2500 features a user-friendly instrument cluster with analog gauges‚ digital displays‚ and intuitive controls. The dashboard layout provides easy access to essential vehicle information‚ ensuring a safe and efficient driving experience. Steering wheel-mounted controls enhance convenience‚ allowing drivers to manage functions without distractions.

Understanding the Dashboard Layout

The 2018 Ram 2500 dashboard is designed for easy access to critical vehicle information. Analog gauges‚ including the speedometer‚ tachometer‚ fuel level‚ and coolant temperature‚ are centrally located for quick reference. Digital displays provide additional details such as gear position and trip information. Controls for lighting‚ climate‚ and infotainment systems are intuitively placed‚ ensuring minimal distraction while driving.

The dashboard also features a central display screen that shows navigation‚ audio settings‚ and system alerts. Drivers can customize settings and access menus using steering wheel-mounted buttons‚ enhancing convenience and safety on the road.

Operating the Infotainment System

The 2018 Ram 2500 features an advanced Uconnect infotainment system‚ offering a user-friendly interface with a high-resolution touchscreen display. Drivers can navigate through menus to access audio settings‚ Bluetooth connectivity‚ and navigation. Voice command functionality allows hands-free control of phone calls‚ music‚ and destination entry. The system also supports smartphone integration via Apple CarPlay and Android Auto‚ enabling seamless connectivity. For convenience‚ customizable shortcuts and presets are available to tailor the experience to individual preferences. Refer to the manual for detailed instructions on optimizing system performance and troubleshooting common issues.

Maintenance and Service Schedule

The 2018 Ram 2500 manual outlines recommended maintenance intervals to ensure optimal performance. Regular oil changes‚ tire rotations‚ and fluid checks are essential for longevity. Download the PDF manual for detailed schedules and service guidelines.

Recommended Maintenance Intervals

Regular maintenance is crucial for the longevity and performance of your 2018 Ram 2500. The manual recommends oil changes every 7‚500 miles or as specified by the oil change indicator. Tire rotations should occur every 5‚000 miles to ensure even wear. Fluid levels‚ including engine oil‚ coolant‚ and transmission fluid‚ should be checked every 15‚000 miles. Brake pads and rotors should be inspected annually or as needed. The comprehensive 700-page manual provides detailed schedules and guidelines to keep your truck in optimal condition‚ ensuring reliability and preventing potential issues.

Fluid Levels and Capacities

The 2018 Ram 2500 manual specifies essential fluid levels and capacities to ensure proper vehicle operation. Engine oil capacity varies by engine type‚ with the 6.7L Cummins diesel requiring approximately 12 quarts. Coolant capacity is around 17.5 quarts for the diesel engine. Transmission fluid levels should be checked when warm‚ with capacities depending on the transmission type. Brake fluid and power steering fluid levels are also critical and should be inspected regularly. Adhering to these guidelines ensures optimal performance and prevents potential damage to your truck’s systems.

Owner’s Manual and Additional Resources

The 2018 Ram 2500 manual is available as a free PDF download‚ offering comprehensive guidance on operation‚ maintenance‚ and troubleshooting. Additional resources include quick reference guides and online support.

Navigating the Owner’s Manual

Navigating the 2018 Ram 2500 Owner’s Manual is straightforward‚ with clear sections for operation‚ maintenance‚ and troubleshooting. The manual is organized into categories like Instrument Cluster‚ Controls‚ and Safety Features‚ making it easy to find specific information. Use the table of contents or search function to quickly locate topics such as towing procedures or fluid levels. Additional resources‚ like the Quick Reference Guide‚ provide concise instructions for common tasks. For digital convenience‚ the manual is available online or as a downloadable PDF‚ ensuring accessibility wherever you are.

Accessing Digital Manuals and Guides

Accessing digital versions of the 2018 Ram 2500 manuals is convenient and free. Visit the official Ram website or platforms like CarManualsOnline.info to download the Owner’s Manual‚ Quick Reference Guide‚ and Service Manuals in PDF format. These resources are searchable and printable‚ allowing you to quickly find specific information. Digital manuals offer the same detailed content as their physical counterparts but with added flexibility. Ensure you always refer to official sources for accurate and up-to-date information to maintain your vehicle effectively.

Safety Features and Precautions

The 2018 Ram 2500 is equipped with advanced safety features‚ including multiple airbags‚ electronic stability control‚ and trailer sway control. Always follow safety guidelines and precautions to ensure safe vehicle operation and minimize risks while driving or towing.

Advanced Safety Features

The 2018 Ram 2500 offers a range of advanced safety features designed to enhance driver confidence and protect occupants. These include multiple airbags‚ electronic stability control‚ and trailer sway control. The vehicle also features a robust braking system with anti-lock technology to prevent wheel lockup during sudden stops. Additionally‚ the Ram 2500 is equipped with a tire pressure monitoring system to ensure optimal tire performance and safety. These features work together to provide a secure driving experience‚ whether on the highway or towing heavy loads.

Driving Tips for Safe Operation

For safe operation of your 2018 Ram 2500‚ always adjust your driving habits to account for the vehicle’s size and weight. When towing or carrying heavy payloads‚ reduce speed and increase following distance. Be aware of the truck’s height and width to avoid accidents in tight spaces or low-clearance areas. Use mirrors and cameras frequently to monitor blind spots. Avoid sudden maneuvers and ensure cargo is properly secured. Adhere to recommended load ratings and driving guidelines for optimal control and safety on the road.

Towing and Payload Capacity

The 2018 Ram 2500 offers impressive towing and payload capacities‚ ensuring heavy-duty performance. Always adhere to the recommended guidelines for safe and efficient operation.

Maximum Towing Capacity

The 2018 Ram 2500 boasts an impressive maximum towing capacity‚ enabling it to handle heavy loads with ease. Equipped with a powerful engine and robust axle ratios‚ this truck can tow up to 18‚000 lbs when properly configured. The 6.7L Cummins Turbo Diesel engine delivers exceptional torque‚ while the available Max Tow Package further enhances its capabilities. Always refer to your owner’s manual for specific towing limits and guidelines to ensure safe and efficient hauling. Proper setup and adherence to weight ratings are crucial for optimal performance.

Proper Towing Procedures

To ensure safe and efficient towing with your 2018 Ram 2500‚ follow these steps: Always use a weight-distributing hitch and adhere to the vehicle’s towing capacity. Secure the trailer with a Class V hitch ball and ensure proper load distribution. Connect the wiring harness and test brake and lighting systems. Perform a pre-tow checklist‚ including tire pressure and fluid checks. Maintain a steady speed and avoid sudden maneuvers. Use the integrated trailer brake controller for enhanced control. Refer to your owner’s manual for specific guidelines and weight limits to ensure safe towing operations.

nigerian passport application form pdf

The Nigerian Passport Application Form PDF is a standardized document required for applying for a Nigerian passport. It ensures accurate and complete submission of personal details, travel plans, and supporting documents. The form is available online via the official immigration portal, enabling applicants to download, fill, and submit it efficiently. Its proper completion is crucial to avoid delays in processing. The PDF format ensures accessibility and compatibility across devices.

1.1 Overview of the Nigerian Passport and Its Importance

The Nigerian passport is an official travel document issued by the Nigerian Immigration Service, verifying citizenship and enabling legal entry into foreign countries. It serves as a critical identity document for international travel, ensuring the bearer’s nationality and right to return. The passport is essential for global mobility, facilitating education, business, tourism, and diplomatic engagements. Its issuance is strictly regulated to maintain national security and identity integrity.

1;2 Brief History and Evolution of the Nigerian Passport

The Nigerian passport has undergone significant transformations since its inception. Historically, it was a paper-based document with minimal security features. In 2007, Nigeria introduced the e-Passport, embedding biometric data and microchips to enhance security. The digital evolution continued with the adoption of online applications in 2020, streamlining the process. These advancements ensure authenticity, reduce forgery, and align with global travel standards, making the Nigerian passport more secure and efficient for citizens.

Steps to Obtain the Nigerian Passport Application Form PDF

To obtain the Nigerian Passport Application Form PDF, visit the official Immigration portal, download the form, and ensure all required information is accurately provided.

2.1 How to Download the Application Form from Official Websites

To download the Nigerian Passport Application Form PDF, visit the official Immigration portal at https://portal.immigration.gov.ng/. Navigate to the passport section, select the appropriate form, and download it. Ensure you have Adobe Reader installed to view and print the form. Follow the on-screen instructions carefully to avoid errors. Always verify the portal’s authenticity to prevent fraudulent activities.

2.2 Navigating the Immigration Portal for Form Access

Access the Nigerian Immigration portal at https://portal.immigration.gov.ng/. Click on the passport menu, select “E-Passport Application,” and choose the appropriate passport type. Follow the prompts to fill in required details. Ensure you have Adobe Reader installed to view and print the form. Verify the portal’s authenticity to avoid fraudulent activities and ensure a secure application process.

Eligibility Criteria for a Nigerian Passport

Citizenship is the primary requirement, including by birth, descent, adoption, naturalization, or registration. Applicants must meet legal conditions, ensuring genuine links to Nigeria.

3.1 Citizenship Requirements for Passport Application

To apply for a Nigerian passport, applicants must be citizens of Nigeria by birth, descent, adoption, naturalization, or registration. Citizenship by naturalization or registration requires legal documentation. Adoptees need proof of adoption. Dual citizens must declare allegiance to Nigeria. Applicants born abroad to Nigerian parents qualify under descent. All must provide valid proof of citizenship, ensuring eligibility for passport issuance.

3.2 Special Cases (Adoption, Naturalization, etc.)

Special cases, such as adoption or naturalization, require additional documentation. Adoptees must submit a court-issued adoption certificate. Naturalized citizens need their naturalization certificate. Surrogacy cases require legal documents from Nigerian courts. Applicants via registration must provide their registration papers. These documents ensure eligibility for a Nigerian passport, adhering to legal requirements for citizenship verification in such cases. Proper submission of these documents is essential for successful application processing.

Required Documents for Passport Application

The application requires a birth certificate, national ID, photocopy of passport data page, marriage certificate (if applicable), and payment confirmation slip. Ensure all documents are valid.

4.1 List of Mandatory Documents for Fresh Applications

For fresh applications, mandatory documents include a birth certificate, national ID, photocopy of passport data page, marriage certificate (for married applicants), and payment confirmation slip. Ensure all documents are valid and notarized where required. Additional documents like a letter of introduction from a guarantor may be requested. Always verify requirements before submission to avoid delays.

4.2 Additional Requirements for Renewal or Replacement

For renewal or replacement, applicants must submit their expired or damaged passport, along with a photocopy of the data page. If the passport is lost or stolen, a formal letter explaining the circumstances is required. Additional documentation, such as a police report for stolen passports, may be necessary. Ensure all copies are clear and legible to avoid processing delays. These requirements supplement the standard mandatory documents.

Filling Out the Nigerian Passport Application Form

The Nigerian Passport Application Form PDF requires precise and complete information to ensure smooth processing. Applicants must fill in personal details, travel history, and contact information accurately.

5.1 Tips for Accurate and Complete Form Submission

To ensure a smooth application process, carefully review the form before submission. Use block letters for clarity, avoid abbreviations, and ensure all sections are filled. Provide accurate contact information and verify spellings. Sign and date where required. Double-check supporting documents alignment with form requests. Illegible handwriting or incomplete fields can delay processing. Use the online portal’s “Save and Continue” feature to manage complex sections effectively.

5.2 Common Mistakes to Avoid During Form Filling

Common errors include providing incorrect or incomplete information, misaligning supporting documents, and omitting signatures. Ensure all details match official records to avoid delays. Avoid using abbreviations or unclear handwriting, as this can lead to rejection. Double-check the application for missing fields or discrepancies in dates and names. Incomplete forms or unsigned sections can result in processing delays or rejection. Stay vigilant to ensure accuracy.

Submission and Processing of the Application

After completing the form, submit it online or in person at designated immigration offices. Ensure all required documents are attached. An appointment is typically mandatory for in-person submissions. Processing times vary depending on the type of application and workload. Status updates are available online. Proper submission ensures timely processing.

6.1 Online Submission and Appointment Booking

The online submission process begins with accessing the Nigerian Immigration Service portal. Applicants must fill out the form, upload required documents, and make payments. After submission, an appointment booking option is available. This step ensures a streamlined process. Properly uploaded documents and payment confirmation are essential. The appointment booking system helps manage in-person visits efficiently. Timely submission ensures faster processing.

6.2 In-Person Submission at Immigration Offices

After completing the online application, applicants can submit their forms and documents in person at designated immigration offices. This step requires presenting printed copies of the application form, payment confirmation slips, and all supporting documents. An appointment booked via the portal is necessary for in-person submissions. Ensure all documents, including the Imm. 22 form, are correctly filled and brought along for a smooth process. Proper submission ensures timely processing.

Payment Procedures for Passport Application

The Nigerian passport application requires online payment through the immigration portal. Fees vary based on passport type and processing speed. Payment confirmation and receipts are generated post-transaction.

7.1 Online Payment Options and Fees

The Nigerian passport application process offers online payment options through the immigration portal. Applicants can use credit/debit cards or online banking to pay fees. Fees vary based on passport type (Standard, Official, Diplomatic) and processing speed (Regular, Expedited). Payment confirmation slips are generated after successful transactions, serving as proof of payment. Ensure to print or save the receipt for submission.

7.2 Payment Confirmation and Receipt Generation

After completing the online payment, a confirmation slip is generated and displayed. Applicants must print or save this slip as proof of payment. The receipt includes a unique transaction reference number and payment details. It is essential to submit this confirmation slip along with the application form, as it serves as verification of payment. Without it, the application process cannot proceed.

Tracking the Application Status

Applicants can track their passport application status online via the immigration portal using their application reference number. This service provides real-time updates on processing progress.

8.1 How to Check Application Progress Online

To check the status of your Nigerian passport application online, visit the official immigration portal and navigate to the application tracking section. Enter your unique application reference number, which is provided upon submission. The system will display real-time updates on your application progress, including processing stages and estimated completion timelines. This service is accessible 24/7, ensuring transparency and convenience for applicants.

8.2 Contact Information for Application Inquiries

For inquiries or issues related to your Nigerian passport application, visit the official website of the Nigerian Immigration Service at https://portal.immigration.gov.ng/. Use the contact form or call the provided phone numbers for assistance. You can also reach out via email at the addresses listed on the portal. These resources ensure timely resolution of application-related queries.

Addressing Common Issues and Errors

The Nigerian Passport Application Form PDF requires careful submission to avoid delays. Common issues include incomplete or incorrect data, which can be resolved by verifying all details before submission.

9.1 Troubleshooting Common Application Problems

Common issues with the Nigerian Passport Application Form PDF include incomplete submissions, payment errors, or mismatched documents. Applicants should verify all details before submitting and ensure documents meet specified requirements. For technical issues, contacting the immigration support team or revisiting the online portal can resolve problems. Correcting errors promptly ensures smoother processing and avoids delays in passport issuance.

9.2 Resolving Discrepancies in Application Forms

Discrepancies in the Nigerian Passport Application Form PDF, such as incorrect data or missing information, must be addressed promptly. Applicants should review the form thoroughly, ensuring all fields are accurate and complete. If errors are detected after submission, contacting the immigration office or updating the form through the online portal can help resolve issues. Correcting discrepancies ensures the application is processed without delays.

The Future of the Nigerian e-Passport

The Nigerian e-Passport is set to feature enhanced security, biometric integration, and real-time tracking, ensuring global compatibility and streamlined travel processes for citizens.

10.1 Features and Benefits of the e-Passport

The Nigerian e-Passport incorporates advanced biometric technology, enhancing security and reducing fraud. It features a microchip storing the holder’s data, ensuring seamless travel and faster border checks. The e-Passport aligns with global standards, making it more acceptable internationally. Citizens benefit from increased efficiency, reduced processing times, and improved protection against identity theft. It symbolizes Nigeria’s commitment to modernizing travel documents.

10.2 Upcoming Enhancements and Modernization Plans

The Nigerian government plans to enhance the e-Passport system by integrating digital application processes and advanced biometric verification. Future updates include AI-driven security features and blockchain technology to combat forgery. These modernization efforts aim to streamline applications, reduce processing times, and improve user experience. The goal is to align Nigeria’s passport system with global technological advancements, ensuring efficiency and security for citizens.

The Nigerian passport application process is streamlined for efficiency. Ensure all documents are accurate and complete to avoid delays. Double-check the form before submission online.

11.1 Final Checklist Before Submitting the Application

Ensure all sections of the form are completed accurately. Verify signature and dates where required. Attach mandatory documents like valid ID, birth certificate, and marriage certificate (if applicable). Confirm payment confirmation slip and appointment booking. Review passport photo specifications and ensure it meets requirements. Double-check all details for accuracy to prevent delays in processing.

11.2 Importance of Timely and Accurate Application

Submitting a timely and accurate application ensures faster processing and avoids unnecessary delays. Incomplete or incorrect information can lead to rejection or extended wait times. Ensuring all details are correct and documents are complete helps maintain the integrity of the process. Timely submission allows applicants to plan travel or official engagements without hindrance. Accuracy prevents potential issues during immigration checks.

valve guide replacement

Valve guides play a critical role in engine performance by ensuring proper valve alignment and sealing. Over time, wear and tear can lead to issues like oil consumption and reduced efficiency. Replacing valve guides requires precision and specialized tools to maintain engine integrity and performance.

Understanding the Importance of Valve Guides

Valve guides are crucial for maintaining proper engine performance by ensuring valves operate smoothly and efficiently. They prevent excessive oil consumption and maintain the integrity of the valve train. Over time, wear and tear can lead to issues like increased oil consumption, reduced performance, and potential engine damage. Properly functioning valve guides are essential for maintaining combustion efficiency and overall engine reliability.

Overview of the Replacement Process

Valve guide replacement involves removing the old guides, inspecting the cylinder head, and installing new ones. Pressing out the worn guides and reaming the area ensures proper fitment. New guides are then pressed in and reamed to precise dimensions for optimal performance. Proper alignment and fitment are critical to prevent future issues. The process requires specialized tools and careful measurement to maintain engine integrity and functionality.

Tools and Materials Needed for Valve Guide Replacement

A deep well socket, valve guide reamer, and a hydraulic press are essential for removing and installing guides. Measuring tools ensure proper fitment, while a drill press aids in precise alignment. Bronze valve guides, sealants, and new valve stems may also be required. Specialized tools are crucial for a successful replacement process, ensuring accuracy and preventing further engine damage.

Essential Tools for the Job

A deep well socket slightly larger than the valve guide is crucial for removal, while a smaller socket can be used on top. A valve guide reamer ensures proper sizing, and a hydraulic press is necessary for pressing guides in and out. Measuring tools like calipers or micrometers are vital for accurate fitment. A drill press aids in precise alignment, and sealants may be required to secure the guides. These tools ensure a precise and efficient replacement process, minimizing engine damage.

Materials Required for Replacement

New valve guides, typically bronze, are essential for replacement. They often feature dual rings for secure seating. Sealants like RTV silicone ensure a leak-proof installation. Replacement valve guide sleeves may be needed if the cylinder head is damaged. Lubricants prevent galling during installation. Proper materials ensure durability and optimal engine performance. Always verify compatibility with your engine specifications before purchasing. Correct materials are crucial for a successful replacement.

Step-by-Step Guide to Valve Guide Replacement

The process involves removing the old guides, often by pressing them out, and installing new ones. Reaming ensures proper fit and alignment. Precision is key.

Removing the Old Valve Guides

Removing old valve guides typically involves pressing them out carefully to avoid damaging the surrounding area. Use a deep well socket slightly larger than the guide to support it. Apply gentle pressure and ensure the guide is removed straight to prevent cylinder head damage. Some mechanics use a smaller socket on top for better control. Once removed, inspect the area for debris or damage before proceeding with the replacement.

Installing the New Valve Guides

Installing new valve guides requires precision to ensure proper alignment and fit. Start by applying a thin layer of engine oil to the new guide for lubrication. Use a hydraulic press or specialized tool to press the guide into place, ensuring it is square to the valve seat. Once installed, ream the guide to the correct dimension for proper valve stem sealing and engine performance. Always follow manufacturer specifications for the reaming process to avoid over-tightening or misalignment.

Common Mistakes to Avoid During Replacement

Pitfalls in the Replacement Process include improper alignment, using incorrect tools, and neglecting to ream guides post-installation. These errors can lead to poor engine performance.

Pitfalls in the Replacement Process

One common pitfall is using the wrong tools, such as a deep well socket that’s too small, which can damage the guide or surrounding material. Another mistake is improper alignment, leading to crooked installation and potential engine damage. Additionally, neglecting to ream the guides after pressing them in can result in poor fitment and reduced engine efficiency. Always ensure precise measurements and follow proper techniques to avoid these issues.

Troubleshooting Common Issues

Common issues during valve guide replacement include misalignment, incorrect reaming, and improper seating. Misalignment can cause uneven wear, while incorrect reaming may lead to a loose fit. If the guide doesn’t seat properly, it might indicate a sizing issue. Always check for squareness and ensure the guide is fully seated before reaming. Proper tools and techniques are essential to avoid these problems and ensure a successful replacement. Regular inspection can help catch issues early, preventing further damage.

Signs Indicating the Need for Valve Guide Replacement

Excessive oil consumption, smoke from the exhaust, and increased engine noise are key indicators of worn valve guides. These symptoms signal potential guide failure.

Recognizing Wear and Tear Symptoms

Worn valve guides often present with excessive oil consumption and blue smoke from the exhaust. Increased engine noise, particularly a tapping sound, is another common indicator. Over time, these symptoms can escalate, leading to reduced engine performance and efficiency. If left unchecked, damaged guides may cause valve misalignment, potentially resulting in costly engine repairs. Early identification of these signs is crucial for preventing further damage.

Diagnosing Valve Guide Failure

Diagnosing valve guide failure involves a combination of visual inspection and specific tests. A leak-down test can reveal excessive leakage around the valves, indicating worn guides. Visual inspection may show abnormal wear patterns or movement in the guides. Measuring guide clearance with specialized tools helps confirm wear beyond acceptable limits. Additionally, misaligned valves or excessive oil consumption can signal guide failure. Early diagnosis is crucial to prevent further engine damage and costly repairs.

Measuring and Selecting the Correct Valve Guides

Accurate measurements of the valve guide bore are essential to ensure proper fitment. The outside diameter of the new guide must match the engine’s specifications precisely.

Importance of Proper Measurements

Proper measurements are crucial for selecting the right valve guides. Incorrect sizing can lead to improper fitment, causing engine performance issues, increased wear, and potential damage. Accurate measurements ensure optimal alignment and sealing, preventing oil leaks and maintaining efficiency. Always measure the valve guide bore and compare it with the manufacturer’s specifications to choose the correct replacement guides. This step ensures reliability and longevity of the engine.

Choosing the Right Replacement Guides

Selecting the correct replacement valve guides is vital for engine performance. Bronze guides are often recommended for their durability and heat resistance. Ensure the guides match the engine’s specifications and are compatible with the valve type. Consider the valve guide’s length and outside diameter to maintain proper fitment and prevent future wear. Consulting a machine shop or supplier can help in selecting the ideal guides tailored to your engine’s needs.

Reaming and Installing New Valve Guides

Reaming ensures the new guides fit precisely, while installation requires pressing them into place. Proper alignment and sizing are crucial for optimal engine performance.

Reaming Process for Proper Fit

The reaming process involves using a specialized tool to enlarge the valve guide hole to the exact required diameter. This ensures a snug fit for the new guide, preventing excessive play or tightness. Proper reaming requires careful measurement and alignment to maintain cylinder head integrity. After reaming, the surface should be smooth and free of debris for optimal performance.

Installation Best Practices

When installing new valve guides, ensure they are pressed in evenly using a hydraulic press or specialized tool. Align the guide precisely with the valve seat to avoid misalignment. Apply a thin layer of oil to the guide’s outer diameter for smoother installation. After installation, ream the guide to the specified diameter to ensure proper valve stem clearance and optimal engine performance. This step is crucial for maintaining engine efficiency and longevity.

Ensuring Proper Alignment and Fitment

Proper alignment is crucial for valve guide replacement. Use specialized tools like a hydraulic press and reamers to ensure accurate fitment. Always check the valve seat and stem clearance for optimal performance and engine longevity.

Checking for Proper Fitment

Proper fitment is essential for valve guide replacement. After installation, use precision gauges to measure clearance between the valve stem and guide. Ensure the guide is square to the valve seat using alignment tools. Check for any signs of wobble or improper seating, as these can lead to poor engine performance and premature wear. Verify that the reamed diameter matches specifications for optimal sealing and operation.

Post-Installation Checks and Tests

After installing new valve guides, perform a series of checks to ensure everything functions correctly. Start by verifying proper alignment and fitment, then test engine performance under various conditions.

Verifying the Replacement

Verifying the replacement ensures the new valve guides are correctly installed. Begin by visually inspecting the guides for proper alignment and seating. Check for any signs of movement or misalignment, as these can indicate installation issues. Next, perform a leak test by applying compressed air to the guide area to detect any gaps or improper sealing. Finally, measure the guide’s concentricity and runout using precision tools to confirm they meet factory specifications. Proper verification guarantees optimal engine performance and prevents future complications such as oil leaks or valve damage.

Testing Engine Performance

After replacing the valve guides, testing engine performance is crucial to ensure proper functionality. Start by running the engine and checking for leaks around the valve area. Monitor the engine’s idle and acceleration performance, ensuring smooth operation without unusual noises. Use diagnostic tools to check for any remaining issues, such as misfires or decreased compression. A properly functioning engine will display improved efficiency, reduced oil consumption, and enhanced overall performance.

Valve guide replacement is a critical process that ensures optimal engine performance and longevity; Proper execution requires careful planning, precise tools, and adherence to best practices.

Final Thoughts on Valve Guide Replacement

Valve guide replacement is a precise process requiring careful planning and execution. Proper tools, accurate measurements, and adherence to best practices ensure optimal results. Worn guides can lead to engine inefficiency and damage, making replacement crucial for maintaining performance. Avoid common pitfalls like improper alignment or insufficient reaming, as these can compromise the repair. With attention to detail and the right techniques, valve guide replacement can restore your engine to peak condition and prevent future issues.

Encouragement for Further Learning

Exploring additional resources and guides can deepen your understanding of valve guide replacement. Online forums, repair manuals, and instructional videos provide valuable insights and tips. Engaging with experienced mechanics and staying updated on new techniques enhances your skills. Continuous learning ensures you stay proficient in diagnosing and addressing valve guide issues effectively, making you more confident in tackling complex engine repairs and maintaining optimal engine performance.

Additional Resources

Explore repair manuals, instructional videos, and forums for detailed guidance on valve guide replacement. These resources offer practical tips and expert advice to aid your project.

Recommended Reading

For comprehensive insights, refer to engine repair manuals like the Valve Guide Replacement Handbook. Additionally, technical forums and instructional videos provide step-by-step guidance. These resources cover tools needed and common pitfalls to avoid. They emphasize proper measurement techniques and the importance of selecting the right materials. By consulting these sources, you can ensure a successful replacement process and maintain optimal engine performance.

Useful Tools and Suppliers

Essential tools for valve guide replacement include deep well sockets, presses, and reamers. Reputable suppliers like Mahle and Oring provide high-quality guides. Specialized engine shops often supply precise measurement tools. Choosing the right tools ensures accurate fitment and prevents damage. Always refer to trusted brands to guarantee durability and performance. These tools and suppliers are crucial for a successful replacement process.

cooking instructions for tombstone pizza

Tombstone Pizza is a popular frozen pizza brand known for its convenience and flavor. Founded in 1962, it offers a variety of crust types and toppings, making it a favorite for quick meals. The brand emphasizes high-quality ingredients and easy cooking instructions, ensuring a delicious homemade experience without the hassle.

1.1. Overview of Tombstone Pizza and Its Popularity

Tombstone Pizza has gained widespread popularity as a convenient and flavorful frozen pizza option. Known for its high-quality ingredients and variety of crust types, it appeals to a broad audience. The brand, founded in 1962, rose to prominence in the 1980s and 1990s, becoming a staple in many households. Its popularity stems from its ease of preparation and satisfying taste, making it a favorite for family meals and casual gatherings. With a range of toppings and crust styles, Tombstone Pizza continues to be a top choice for those seeking a delicious, hassle-free dining experience.

1.2. Key Features of Tombstone Pizza Crust and Toppings

Tombstone Pizza is celebrated for its distinctive crust, which is both crispy and golden, providing a satisfying texture. The crust is designed to hold up well when baked, avoiding sogginess. Toppings are generously portioned, featuring a blend of melted cheese, savory meats like pepperoni, and fresh vegetables. The sauce is zesty, adding a burst of flavor. The combination of these elements creates a well-balanced and delicious pizza experience. Whether it’s the classic cheese or loaded with toppings, Tombstone ensures a mouthwatering meal every time.

Preheat oven to 400°F. Remove pizza from packaging and place directly on the oven rack. Bake for 16-18 minutes until cheese is melted and edges golden.

2.1. Preheating the Oven to the Recommended Temperature

Preheating your oven to the correct temperature is essential for cooking Tombstone Pizza. Set your oven to 400°F (200°C) and allow it to preheat for at least 10-15 minutes. This ensures even heating and helps achieve a crispy crust. Different crust types may require slightly different temperatures—thin crust at 425°F (220°C) and regular crust at 400°F. Always refer to the packaging for specific instructions, as variations may exist. Proper preheating is crucial for optimal flavor and texture, so patience is key before placing the pizza in the oven.

2.2. Removing the Pizza from Packaging

To start cooking your Tombstone Pizza, carefully remove it from the packaging. Begin by cutting or tearing open the plastic overwrap that covers the pizza. Next, lift the pizza by the cardboard circle underneath and place it on a flat surface. Gently pull the pizza away from the cardboard to separate it completely. Ensure the pizza is free from any packaging materials before proceeding. This step is straightforward but crucial for safe and even cooking. Always handle the pizza with care to avoid damaging the crust or toppings. Once removed, your pizza is ready to be placed in the oven for baking.

2.3. Placing the Pizza Directly on the Oven Rack

After removing the pizza from its packaging, place it directly on the center oven rack. Position the pizza 6 to 8 inches from the bottom of the oven to ensure even cooking and a crispy crust. Avoid using a baking sheet, as this can prevent air from circulating under the crust, leading to a softer texture. Gently grasp the pizza by the edges or use a pizza peel if available to slide it onto the rack. Proper placement is crucial for achieving the desired texture and flavor. This step ensures the pizza cooks evenly and prevents it from becoming misshapen during baking.

2;4. Baking Time and Temperature Guidelines

Preheat your conventional oven to 400°F (200°C). For a regular crust Tombstone pizza, bake for 16-18 minutes. Thin crust varieties require a higher temperature of 425°F (220°C) and take 12-15 minutes. Ensure the oven is fully preheated before placing the pizza inside. Cooking time may vary depending on your oven’s performance, so monitor the pizza closely. The pizza is done when the cheese is melted and the edges are golden brown. Adjust the baking time as needed, but avoid overcooking to prevent the crust from becoming too hard. Always refer to the packaging for specific temperature and time recommendations for the best results.

2.5. Checking for Doneness: Melted Cheese and Golden Edges

To determine if your Tombstone Pizza is fully cooked, look for melted cheese and golden-brown edges. The cheese should be bubbly and evenly spread across the pizza. The crust edges will turn a golden color, indicating crispiness. Avoid opening the oven too frequently, as this can disrupt the cooking process. Once the cheese is melted and the edges are golden, carefully remove the pizza from the oven using oven mitts or a pizza peel. Let it cool for a few minutes before slicing. Proper doneness ensures a crispy crust and a flavorful, well-cooked pizza. Always check the pizza visually to confirm it meets these criteria before serving.

Safety Precautions While Cooking Tombstone Pizza

Always use oven mitts or a pizza peel to handle the hot pizza. Avoid touching the oven rack or pizza surface to prevent burns. Ensure the pizza is thoroughly cooked before consumption to avoid foodborne illness. Keep children away from the oven while cooking. Never leave the oven unattended during the baking process. Properly dispose of packaging materials to avoid accidents. Follow all safety guidelines provided on the packaging and in the cooking instructions.

3.1. General Kitchen Safety Tips

Ensure the kitchen is well-ventilated to avoid smoke buildup. Keep flammable materials away from the oven. Always use oven mitts or tongs to handle hot pans or pizzas. Never leave cooking unattended, especially with children nearby. Maintain a clean workspace to prevent accidents. Avoid wearing loose clothing that could catch fire. Keep emergency contacts, such as the fire department, handy. Store sharp objects and hot utensils out of reach of children; Regularly inspect oven mitts and utensils for wear and tear. Follow all appliance manufacturer guidelines for safe operation. Properly dispose of packaging materials to avoid tripping hazards. Be mindful of slippery floors and clean spills immediately. Stay alert and focused while cooking to ensure a safe environment.

3.2. Avoiding Burns When Handling Hot Pizza

To prevent burns when handling hot Tombstone Pizza, always use oven mitts or tongs to remove the pizza from the oven. Let the pizza cool for a few minutes before cutting to avoid steam burns. Use a pizza peel or baking sheet to safely transfer the pizza. Keep children away and ensure the kitchen is well-ventilated. Avoid leaning over the pizza to prevent burns from steam or splatters. Use a trivet or heat-resistant surface to set the pizza down. Be cautious of molten cheese and ensure all utensils are heat-resistant. Follow Tombstone Pizza’s specific handling recommendations for added safety.

Achieving the Perfect Crust

Achieve a perfect crust by preheating your oven to the recommended temperature, placing the pizza directly on the center rack, and ensuring even heat circulation.

4.1. Factors Affecting Crust Crispiness

The crispiness of a Tombstone Pizza crust depends on several factors. Oven temperature is crucial, as higher heat ensures a crisper base. Placing the pizza directly on the oven rack allows air to circulate evenly, enhancing crispiness. Cooking time also plays a role; overcooking can lead to a burnt crust, while undercooking results in a soft one. Additionally, the type of crust—whether regular, thin, or gluten-free—affects the final texture. Ensuring the oven is preheated properly and monitoring the pizza during baking helps achieve the desired crispiness. These factors work together to deliver a perfectly cooked crust every time.

4.2. Additional Tips for a Crispy Crust

For a perfectly crispy Tombstone Pizza crust, preheat your oven to the recommended temperature and ensure it’s fully heated before baking. Placing the pizza directly on the oven rack allows air to circulate, enhancing crispiness. Avoid opening the oven door too soon, as this can prevent even cooking. If using a pizza stone, preheat it alongside the oven to help absorb moisture and crisp the crust further. After baking, let the pizza rest for a minute to retain crispiness. These tips ensure a golden, crunchy crust that complements the flavors of your Tombstone Pizza perfectly.

Common Mistakes to Avoid

Common mistakes include overcooking, undercooking, and incorrect oven placement. Always follow recommended baking times and temperatures. Ensure the pizza is placed on the center rack for even cooking. Let it rest briefly after baking to avoid a soggy crust. Checking for doneness by melted cheese and golden edges ensures perfection every time.

5.1. Overcooking or Undercooking the Pizza

Overcooking or undercooking Tombstone Pizza can significantly affect its quality. Overcooking leads to a burnt crust and dry toppings, while undercooking results in a soggy base and unmelted cheese. To avoid these issues, adhere to the recommended baking time of 16-18 minutes for a regular crust and 12-15 minutes for a thin crust at the specified temperatures. Keep an eye on the pizza during the last few minutes of baking. The cheese should be melted, and the edges golden brown. If unsure, refer to the packaging instructions for precise guidelines. Proper cooking ensures a crispy crust and flavorful toppings, making your meal enjoyable and satisfying;

5.2. Incorrect Placement in the Oven

Incorrect placement of Tombstone Pizza in the oven can lead to uneven cooking and potential damage. Placing the pizza too close to the top or bottom heating elements may cause the crust to burn or the toppings to overcook unevenly. Additionally, failing to position the pizza in the center rack can result in one side being undercooked while the other is overcooked. To avoid this, always place the pizza directly on the center oven rack, 6 to 8 inches from the bottom of the oven, as recommended. This ensures even heat distribution and prevents hot spots from ruining your meal. Proper placement is key to achieving a perfectly cooked pizza every time.

Additional Resources for Cooking Tombstone Pizza

Visit the official Tombstone Pizza website or retailer sites like HEB for detailed guides. Check product packaging for specific cooking instructions and troubleshooting tips. Customer support is also available for assistance.

6.1. Where to Find Detailed Cooking Guides

Detailed cooking guides for Tombstone Pizza can be found on the official Tombstone Pizza website, product packaging, or retailer sites like HEB. The packaging includes step-by-step instructions and specific temperature settings for different crust types. Additionally, online resources like cooking blogs or forums often share tips for achieving the perfect bake. Customer support is also available for any questions. Always refer to these resources for accurate and up-to-date information to ensure the best cooking results.

craftsman 247.37 manual

Welcome to the Craftsman 247.37 manual guide. This document provides essential information for safe operation, assembly, and maintenance of your lawn mower. Read it carefully for optimal performance and troubleshooting.

Overview of the Craftsman 247.37 Lawn Mower

The Craftsman 247.37 is a 21-inch gas-powered walk-behind lawn mower designed for efficient cutting and reliability. Known for its durable construction, it features a robust steel deck and adjustable handle for comfort. Suitable for small to medium-sized lawns, it offers multiple cutting height settings to adapt to various grass types. The mower is equipped with a powerful engine, ensuring consistent performance. Additional features include a compact design for easy storage and a user-friendly interface. This model is popular among homeowners for its balance of affordability and quality. The manual provides detailed guidance on operation, maintenance, and troubleshooting to ensure optimal use and longevity of the mower. Reading it thoroughly will help you maximize its potential and maintain your lawn effectively.

Importance of Reading the Manual

Reading the Craftsman 247.37 manual is essential for safe, effective, and proper use of the lawn mower. It provides critical safety precautions, assembly instructions, and maintenance tips to ensure optimal performance. The manual outlines guidelines for operating the mower on slopes, which is crucial for preventing accidents. By understanding the instructions, you can avoid potential hazards and extend the lifespan of the mower. Additionally, the manual includes troubleshooting solutions for common issues, helping you resolve problems quickly. Familiarizing yourself with the content ensures compliance with warranty conditions and enables you to maximize the mower’s efficiency. Neglecting to read the manual may lead to improper use, reducing its effectiveness and increasing the risk of damage or injury. Always refer to the manual before starting any task involving the mower.

Safety Precautions and Guidelines

Adhering to safety guidelines is crucial for operating the Craftsman 247.37 lawn mower. Always follow slope mowing safety, wear protective gear, and ensure proper assembly to avoid accidents and ensure warranty compliance.

General Safety Rules

To ensure safe operation of the Craftsman 247.37 lawn mower, follow these essential safety rules. Always wear protective gear, including gloves and eyewear, when operating the mower. Ensure the area is clear of obstacles, children, and pets before mowing. Never operate the mower on slopes greater than 15 degrees, as indicated in the manual. Properly assemble the mower according to the instructions to avoid malfunctions. Read the manual thoroughly before use and follow all manufacturer guidelines. Keep loose clothing and long hair tied back to prevent accidents. Ensure the mower is on level ground when starting the engine. Never leave the mower unattended while it is running. By adhering to these rules, you can ensure a safe and efficient mowing experience. Regular maintenance, as outlined in the manual, is also crucial for optimal performance and warranty validation.

Slope Mowing Safety

Mowing on slopes requires extra caution to prevent accidents. The Craftsman 247.37 manual specifies that slopes greater than 15 degrees are unsafe for mowing. Always measure the slope angle before operating. Mow across slopes, never uphill or downhill, to maintain control. Ensure the mower is on level ground when starting the engine. Avoid sudden turns or braking on inclines, as this can cause loss of balance or machine rollover. If the slope is too steep, consider alternative methods, such as using a trimmer or leaving the area unmowed. Refer to the manual for detailed slope safety guidelines to ensure safe operation and prevent potential hazards.

Assembly and Setup Instructions

Unpack and inventory all parts carefully. Follow the step-by-step assembly guide in the manual to ensure proper setup. Double-check all connections for safety and readiness.

Unpacking and Inventory of Parts

Begin by carefully unpacking the Craftsman 247.37 lawn mower from its box. Ensure all components are included and undamaged. Refer to the manual’s parts list to verify completeness. Check for hardware, such as bolts, screws, and handles, and confirm the presence of accessories like the bagger or mulch kit. If any parts are missing or damaged, contact customer support immediately. Organize the parts in a clean, dry workspace to avoid misplacement. Pay special attention to small items like washers or nuts, which can easily be lost. Once everything is accounted for, proceed to the assembly process. This step ensures a smooth and efficient setup of your lawn mower. Proper inventory helps prevent delays and ensures all necessary components are available when needed. Always follow the manual’s guidelines for safe and correct assembly. If unsure about any part, consult the troubleshooting section for clarity.

Step-by-Step Assembly Process

Start by reviewing the manual’s assembly instructions to familiarize yourself with the process. Carefully unpack all components and ensure no parts are missing or damaged. Attach the handlebars by aligning the bolts and tightening them securely. Next, install the wheels and ensure proper alignment with the mower deck. Use the provided hardware to secure any additional features, such as the grass catcher or mulch kit. Double-check all bolts and screws for tightness to ensure stability. Finally, perform a thorough inspection of the assembled mower to confirm everything is correctly installed. If unsure about any step, consult the troubleshooting section or contact customer support for assistance. Proper assembly is crucial for safe and efficient operation of your Craftsman 247.37 lawn mower.

Operating the Lawn Mower

Mastering the operation of your Craftsman 247.37 ensures efficient mowing. Start by priming the engine and pulling the recoil cord. Adjust the mowing height and blade speed according to your lawn needs. Maintain a steady pace, turning carefully to avoid tire marks. Regularly check and clear the mower deck to prevent clogging. Always keep the mower on a level surface and avoid mowing in reverse unless necessary. Refer to the manual for specific guidelines on handling different terrain and grass types. Proper operation enhances performance and extends the lifespan of your lawn mower.

Starting the Engine

Starting the engine of your Craftsman 247.37 lawn mower is straightforward; Begin by ensuring the mower is on a level surface and the parking brake is engaged. Prime the engine by pressing the primer bulb 2-3 times until it feels firm. Move the choke lever to the “start” position. Grip the recoil handle firmly and pull it in one smooth, steady motion until the engine starts. Once the engine is running, allow it to warm up for a few seconds before adjusting the choke to the “run” position. Always wear protective gear, such as gloves and eye protection, when operating the mower. If the engine does not start after a few attempts, refer to the troubleshooting section for guidance. Proper starting ensures optimal performance and longevity of your lawn mower.

Basic Mowing Techniques

Mastering basic mowing techniques ensures a clean, even cut and prolongs the life of your Craftsman 247.37 lawn mower. Begin by adjusting the mowing height to suit your lawn type, using the lever located on the handlebar. Maintain a steady, consistent pace while mowing, overlapping each pass slightly to avoid missing spots. For uniform results, mow in a pattern, such as up and down in straight lines. Avoid cutting more than one-third of the grass blade length in a single pass to prevent stressing the lawn. Keep the mower blade sharp to ensure clean cuts and prevent tearing the grass. Regularly empty the grass catcher to maintain efficiency. By following these techniques, you can achieve a professional-looking lawn with minimal effort.

Maintenance and Care

Regular maintenance ensures optimal performance and longevity of your Craftsman 247.37 lawn mower. Follow routine checks, cleaning, and lubrication schedules. Sharpen or replace the blade as needed for clean cuts.

Routine Maintenance Tasks

Regular maintenance is crucial for the optimal performance and longevity of your Craftsman 247.37 lawn mower. Start by checking the oil level before each use and changing it as recommended. Clean the air filter regularly to ensure proper engine airflow. Inspect the mower deck for debris and tighten any loose bolts or screws. Sharpen the blade at least once a season to maintain cutting efficiency. Additionally, lubricate moving parts like wheels and pivot points to reduce friction and wear. Check the tire pressure and adjust it according to the manual’s specifications. Finally, store the mower in a dry, protected area during the off-season to prevent rust and damage. Always refer to the manual for detailed maintenance schedules and procedures.

Blade Sharpening and Replacement

Sharpening and maintaining the blade of your Craftsman 247.37 lawn mower is essential for clean cuts and efficient mowing. Start by disconnecting the spark plug for safety. Use a file or grinder to sharpen the blade, ensuring it remains balanced. Sharpening should be done every few months, depending on usage. If the blade is damaged or excessively worn, replace it with a genuine Craftsman part. Refer to the manual for specific blade specifications. Always wear gloves and safety goggles during this process. Proper blade maintenance enhances mower performance and extends its lifespan. Regular checks and timely replacements prevent dull cutting and potential damage to the mower deck. Follow the manual’s instructions for accurate sharpening and replacement techniques to ensure optimal results and safety.

Troubleshooting Common Issues

Identify and resolve common problems with your Craftsman 247.37 mower. Check for issues like dull blades, clogged decks, or faulty starters. Regular maintenance often prevents these issues.

Identifying and Solving Basic Problems

Regularly inspect your Craftsman 247.37 lawn mower to identify common issues early. A dull blade can leave uneven cuts, while a clogged deck reduces efficiency. Check for loose belts or damaged cables that may cause operational issues. If the engine stalls, ensure the fuel level is adequate and the air filter is clean. For mowing difficulties on slopes, verify that the mower is designed for such terrain and that the slope gauge indicates a safe angle. Refer to the troubleshooting section for step-by-step solutions. Addressing these problems promptly ensures optimal performance and extends the lifespan of your mower. Always follow safety guidelines when performing repairs or adjustments.

Advanced Troubleshooting Techniques

For more complex issues with your Craftsman 247.37 lawn mower, advanced troubleshooting techniques are essential. Start by diagnosing the ignition system if the engine fails to start, checking for sparks and ensuring the plug is clean. If the mower struggles on inclines, inspect the transmission fluid levels and look for any signs of leakage. Electrical issues, such as faulty sensors or wiring, may require multimeter testing. Always refer to the official manual or manufacturer guidelines for detailed diagnostic procedures and repair instructions. Addressing these advanced problems promptly ensures your mower operates efficiently and reliably.

Parts and Accessories

Explore genuine Craftsman parts and accessories for your 247.37 lawn mower, including replacement blades, oil filters, and grass catchers. Visit Sears Parts Direct for authentic components and manuals.

Replacement Parts Guide

Find genuine replacement parts for your Craftsman 247.37 lawn mower through Sears Parts Direct; This guide helps you identify and order components like blades, oil filters, and belts. Use the model number to search for specific parts, ensuring compatibility and quality. Refer to the parts diagram in the manual for accurate identification. Common replacements include mower blades, spark plugs, and air filters. Always choose authentic Craftsman parts to maintain performance and warranty validity. Visit the official website or authorized dealers for reliable purchases. Properly installing genuine parts ensures safety and extends the lifespan of your lawn mower;

Recommended Accessories

To enhance your mowing experience with the Craftsman 247.37, consider these recommended accessories. A grass catcher bag is ideal for neatly collecting clippings, while a mulching kit helps fertilize your lawn. A cover protects your mower from dust and moisture during storage. Additionally, a sharpening kit ensures your blade stays in peak condition. For convenience, a replacement blade set is available for easy swaps. These accessories are designed to maximize efficiency and extend the life of your lawn mower. Visit Sears Parts Direct or the official Craftsman website to explore compatible options tailored for your model. Genuine accessories guarantee optimal performance and maintain your warranty coverage.

octavia butler parable of the sower pdf

Octavia Butler’s Parable of the Sower (1993) is a speculative fiction novel set in a dystopian 2024, exploring themes of climate change, societal collapse, and resilience through protagonist Lauren Olamina.

1.1 Brief Summary of the Novel

Parable of the Sower, written by Octavia Butler, is set in a dystopian near-future where climate change and social inequality have led to societal collapse. The story follows Lauren Olamina, a young woman with hyperempathy, a condition that allows her to physically feel the pain of others. Living in a gated community in Orange County, Lauren witnesses the gradual disintegration of her world as resources dwindle and violence escalates. When her community is destroyed, Lauren embarks on a perilous journey north, gathering a group of survivors along the way. Throughout the novel, Lauren develops the Earthseed philosophy, a belief system centered on change and destiny, which becomes her guiding force in navigating a broken world and envisioning a better future.

1.2 Publication Details and Historical Context

Parable of the Sower was published in 1993 by Four Walls Eight Windows, a smaller press at the time, marking a significant work in Butler’s career. The novel is set in a dystopian near-future, reflecting the anxieties of the 1990s, including climate change, economic inequality, and social unrest. Butler’s vision of a collapsing society resonated deeply, as it mirrored real-world concerns about environmental degradation and societal fragmentation. Written during a period of growing awareness of global warming and systemic racism, the novel serves as a warning and critique of unchecked capitalism and governmental failure. Its release coincided with a rise in speculative fiction addressing social issues, solidifying its place as a groundbreaking work in the genre.

Main Character: Lauren Olamina

Lauren Olamina, a young woman living in a dystopian 2024, possesses hyperempathy, allowing her to feel others’ pain. She narrates the story, guiding readers through her journey of survival and hope.

2.1 Character Background and Traits

Lauren Olamina, the protagonist, is a 15-year-old girl living in a dystopian Orange County in 2024. She grows up in a society crumbling due to environmental disaster and economic collapse. Lauren’s father, a preacher and professor, instills in her a sense of morality and resilience. After losing her family, she must navigate a dangerous world alone. Her unique trait, hyperempathy, allows her to physically feel the pain of others, making her both vulnerable and compassionate. Lauren’s determination, intelligence, and adaptability drive her to survive and lead others. Her journal entries reveal her introspective nature and growing vision for a better future, ultimately shaping her role as a leader and the founder of the Earthseed movement.

2.2 The Role of Lauren’s Hyperempathy

Lauren Olamina’s hyperempathy, a rare condition that allows her to feel the pain of others, is a defining trait that shapes her experiences and decisions. This ability makes her deeply compassionate but also vulnerable in a world filled with violence and suffering. Her hyperempathy forces her to navigate a dangerous environment with heightened sensitivity, avoiding situations that could overwhelm her. It also fosters a strong sense of responsibility, driving her to help others and ultimately form a community based on shared values. While her hyperempathy is a source of strength, it also creates emotional burdens, illustrating the dual nature of her gift. This trait underscores Butler’s exploration of interconnectedness and the moral imperative to care for others in a fractured society.

Dystopian Setting and Themes

Parable of the Sower is set in a 2024 America ravaged by climate change and social inequality, envisioning a society on the brink of collapse.

3.1 The Year 2024 and Societal Collapse

In Parable of the Sower, the year 2024 depicts a dystopian America where climate change and social inequality have led to widespread societal collapse. The novel portrays a world grappling with environmental disasters, economic decay, and political instability. Cities are plagued by violence, poverty, and resource scarcity, while gated communities protect the privileged few. Lauren Olamina, the protagonist, witnesses her once-stable neighborhood descend into chaos, reflecting the broader disintegration of societal structures. Butler vividly illustrates how systemic failures and human neglect exacerbate the collapse, creating a bleak yet thought-provoking vision of the near future. Through Lauren’s story, the novel underscores the fragility of modern society and the human cost of systemic neglect.

3.2 Climate Change and Social Inequality

Climate change and social inequality are central themes in Parable of the Sower, intertwining to create a dystopian landscape. Rising temperatures and extreme weather events devastate communities, while economic disparities worsen suffering. The wealthy retreat to gated enclaves, leaving the poor vulnerable to environmental chaos. Lauren Olamina’s world is marked by scarce resources, leading to societal fragmentation. Butler highlights how marginalized groups bear the brunt of environmental degradation, exacerbating existing inequities. The novel serves as a warning about the consequences of ignoring climate change and social injustice, urging collective action to prevent further collapse and create a more equitable future. This dual focus underscores Butler’s vision of interconnected crises shaping humanity’s path.

The Earthseed Philosophy

Earthseed, founded by Lauren Olamina, blends science, spirituality, and social activism, emphasizing adaptation and responsibility. It offers hope amid chaos, guiding humanity toward collective progress and unity.

4.1 Core Principles of Earthseed

Earthseed, the philosophy developed by Lauren Olamina, centres on the belief that “God is Change” and humanity must adapt to survive. It emphasizes community, shared purpose, and the importance of embracing transformation. The core principle is that change is inevitable and essential for growth. Earthseed blends spirituality with practical action, urging individuals to take responsibility for their future. It advocates for unity and collective effort, rejecting isolation and complacency. The philosophy also highlights the interconnectedness of all living beings and the need to cultivate resilience in the face of uncertainty. By fostering hope and agency, Earthseed aims to guide humanity toward a harmonious and sustainable future.

4.2 The Role of Religion in the Novel

Religion in Parable of the Sower serves as both a source of comfort and a critique of traditional belief systems. Lauren Olamina’s hyperempathy and unique worldview challenge conventional religious frameworks, leading her to create Earthseed. The novel portrays religion as a powerful force that can unite or divide communities. Traditional religions are shown as inadequate in addressing the societal collapse, while Earthseed emerges as a pragmatic spirituality rooted in adaptability and resilience; Butler explores how religion can evolve to meet the needs of a changing world, blending the spiritual with the practical. This reflects her interest in how belief systems shape human behavior and survival in the face of uncertainty. Through Lauren’s journey, the novel highlights the tension between faith and action in a dystopian reality.

Literary Significance and Reception

Parable of the Sower is widely acclaimed for its prophetic vision of societal collapse and climate crisis. It has won numerous awards, inspiring grassroots movements and literary acclaim.

5.1 Critical Acclaim and Awards

Parable of the Sower has received widespread critical acclaim for its prescient vision and cultural impact. It won the Hugo Award and is celebrated for its exploration of climate change, inequality, and resilience. The novel has been recognized as a landmark work in speculative fiction, earning Octavia Butler a reputation as a visionary writer. Its inclusion in the Ultimate L.A. Bookshelf underscores its enduring relevance. The book has also been praised for its thought-provoking narrative, which challenges readers to reflect on societal issues. Its influence extends beyond literature, inspiring grassroots movements and cementing its place as a modern classic. The novel’s acclaim continues to grow, solidifying its legacy as a powerful commentary on humanity’s future.

5.2 Impact on Science Fiction and Social Commentary

Parable of the Sower has profoundly influenced science fiction by centering marginalized voices and blending speculative elements with stark social realism. Butler’s exploration of climate change, inequality, and systemic oppression resonated deeply, offering a searing critique of societal structures. The novel’s success paved the way for more diverse narratives in the genre, inspiring authors to tackle urgent real-world issues. Its social commentary remains timeless, addressing themes like corporate greed, environmental degradation, and the exploitation of the vulnerable. The novel’s Earthseed philosophy has also become a cultural touchstone, encouraging readers to think critically about adaptability and community-building. By merging prophecy with protest, Butler’s work continues to inspire both literary and activist movements, cementing its legacy as a groundbreaking work of speculative fiction.

Adaptations and Further Reading

The novel has a sequel, Parable of the Talents, continuing Lauren’s story. A graphic novel adaptation is also available, expanding its reach and themes.

6.1 Sequel: “Parable of the Talents”

Octavia Butler’s Parable of the Talents (1998) continues the story of Lauren Olamina, set in a dystopian America. The novel explores themes of resistance, societal upheaval, and the rise of fascism. Lauren’s journey expands as she faces new challenges, including the exploitation of her Earthseed philosophy by a manipulative leader. The sequel delves deeper into issues of power, identity, and survival, maintaining Butler’s sharp critique of systemic inequality. It received widespread acclaim, further solidifying Butler’s legacy in speculative fiction. The novel’s exploration of human resilience and societal transformation resonates deeply with readers, making it a compelling follow-up to Parable of the Sower.

6.2 Graphic Novel Adaptation

The graphic novel adaptation of Parable of the Sower, published in 2020, brings Octavia Butler’s vision to life through striking visuals and a faithful retelling of Lauren Olamina’s journey. Adapted by Damian Duffy and illustrated by John Jennings, the graphic novel captures the essence of the original text while offering a new medium for engagement. The adaptation maintains the novel’s core themes of climate change, societal collapse, and resilience, presenting them in a visually compelling format. It has been praised for its ability to make the story accessible to a wider audience, including younger readers and those who may not have engaged with the prose version. The graphic novel serves as a powerful complement to Butler’s work, ensuring her timely and timeless message reaches new generations.